
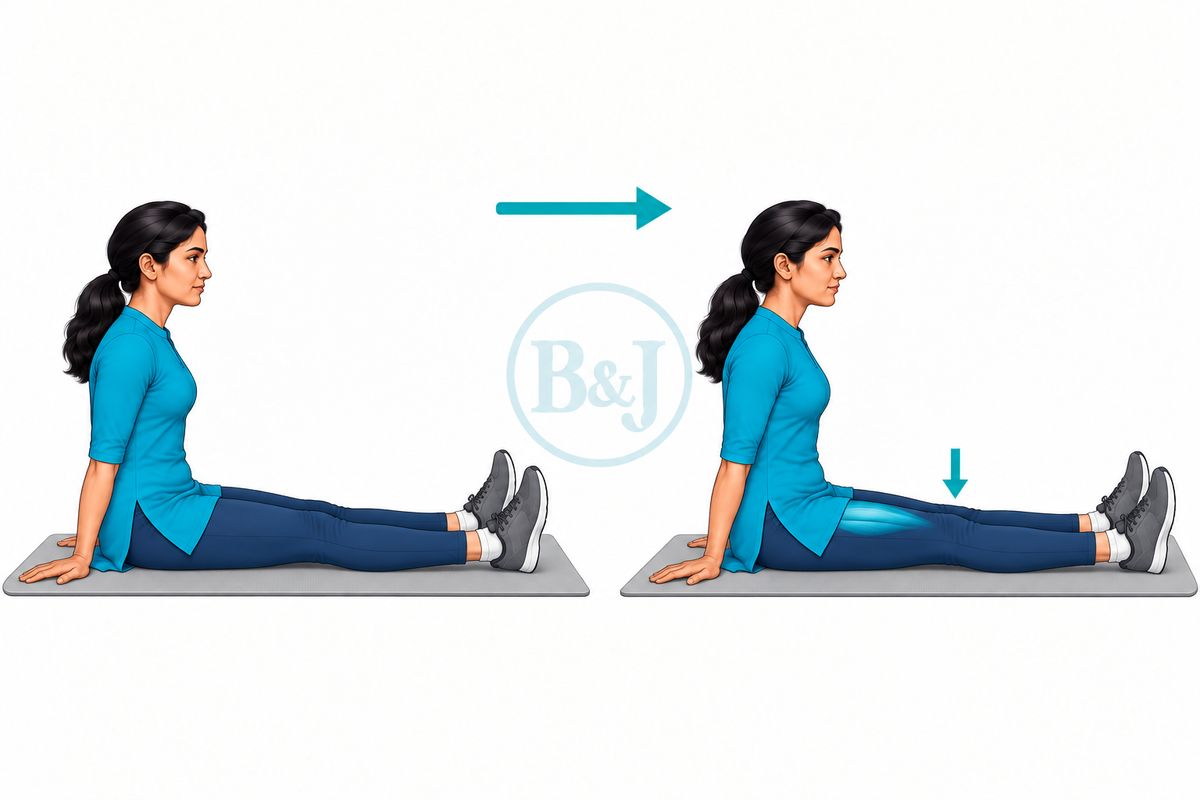
Quad sets
Sit with the leg straight. Press the back of the knee down and tighten the thigh.
- Hold 5 seconds
- 10 times
- 3 times a day
Should feel: The thigh muscle tightening Should not feel: Knee pain
Home / Patient library / Exercise sheets / Sheet 96
Hip & knee · Kneecap dislocation
Count the weeks from the day of your injury. The date is on your prescription.
If your doctor wrote a different plan on your prescription, follow that instead of this page.
A4 PDF, 0.7 MB. Free to download — no sign-up, no email address needed.
Bring the swelling down: rest with the leg raised and the knee straight, and put a cold pack wrapped in a cloth on the knee for 15 minutes, 3–4 times a day. Wear the knee brace for walking and at night, as we have advised. Start the thigh exercises now: strong thigh muscles help hold the kneecap in place.
Weight bearing As written on your prescription, with crutches, and the knee brace if we gave you one.
Sit with the leg straight. Press the back of the knee down and tighten the thigh.
Should feel: The thigh muscle tightening Should not feel: Knee pain
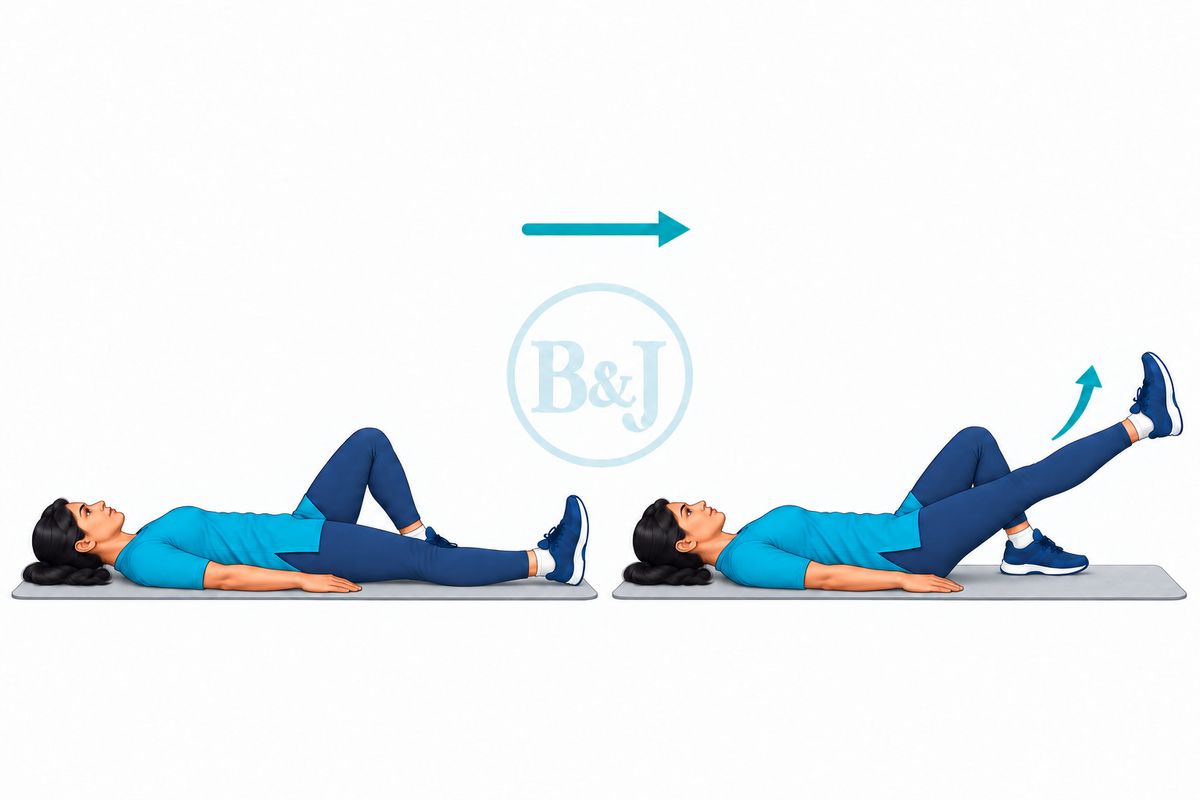
Lie down, one knee bent. Keep the other knee straight and lift the leg 20 cm.
Should feel: The thigh working Should not feel: The knee bending or back pain
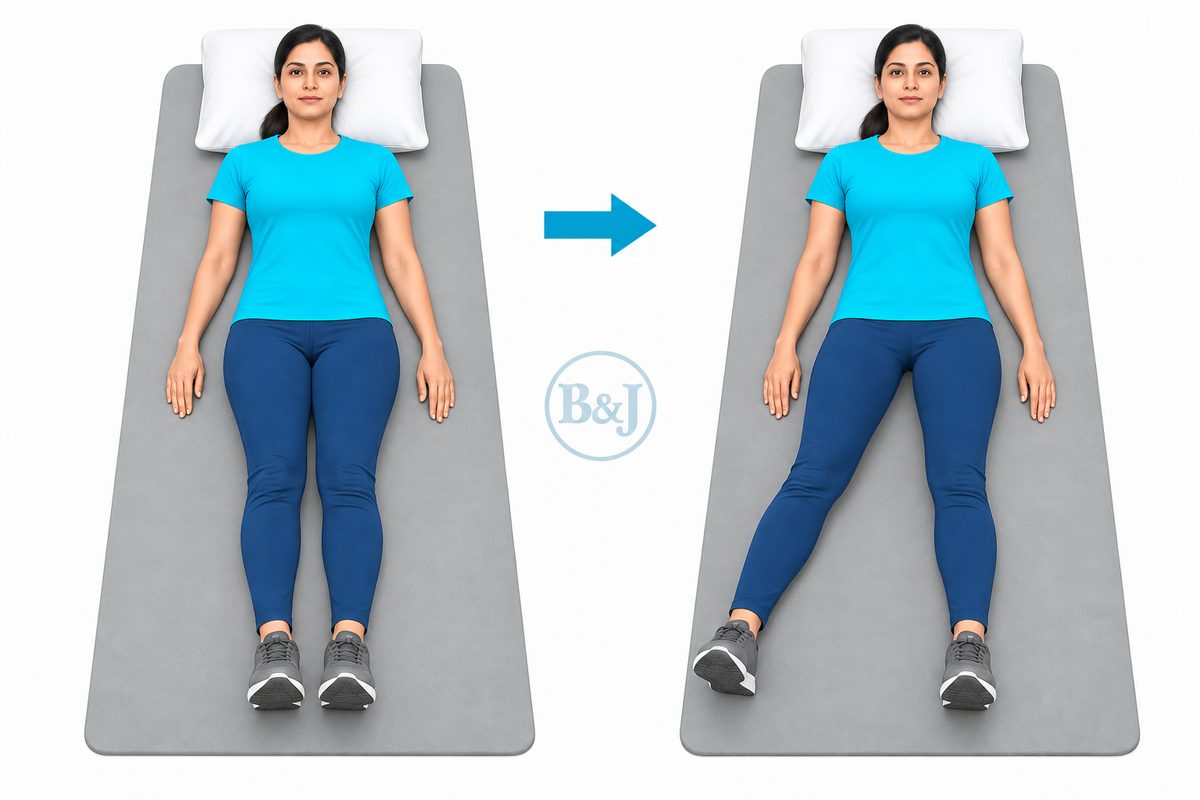
Lie on your back, legs straight, toes pointing up. Slide the leg out to the side and back, keeping the knee straight.
Should feel: The side of the hip working Should not feel: The toes rolling outwards
Not yet A pillow under the knee, bending the knee further than we have allowed, twisting on the injured leg, or driving. Letting anyone, a bone-setter included, push, pull or massage the kneecap.
Move to the next stage only after we have seen you, and the X-ray if one was planned.
Come out of the brace step by step, as we advise. Bend the knee a little further each week, aiming for a right angle by about 6 weeks, and build up the thigh and the side of the hip. Carry on with the earlier exercises.
Weight bearing Full, as comfortable. Wear the brace for walking until we tell you to stop.
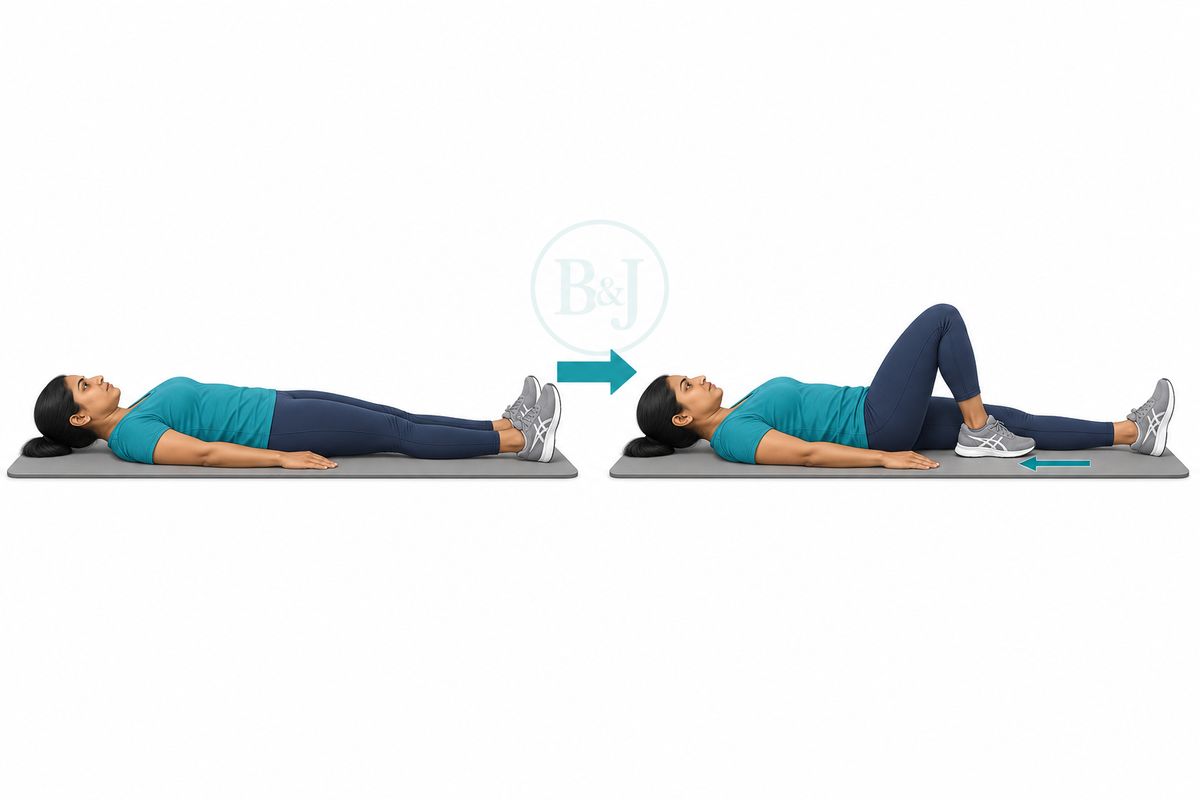
Slide the heel up to bend the knee.
Should feel: The knee bending further each week Should not feel: Sharp pain
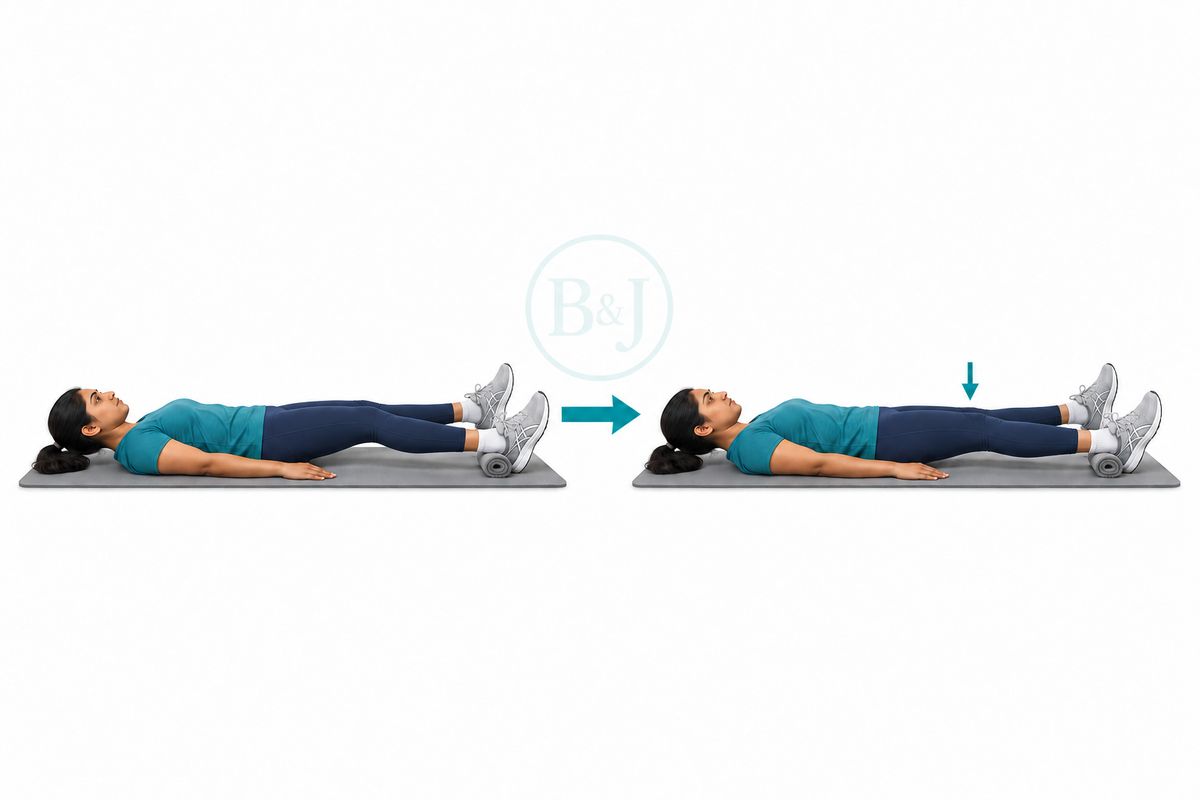
Heel on a rolled towel. Press the knee down straight. Getting it FULLY straight comes first.
Should feel: The back of the knee stretching Should not feel: —
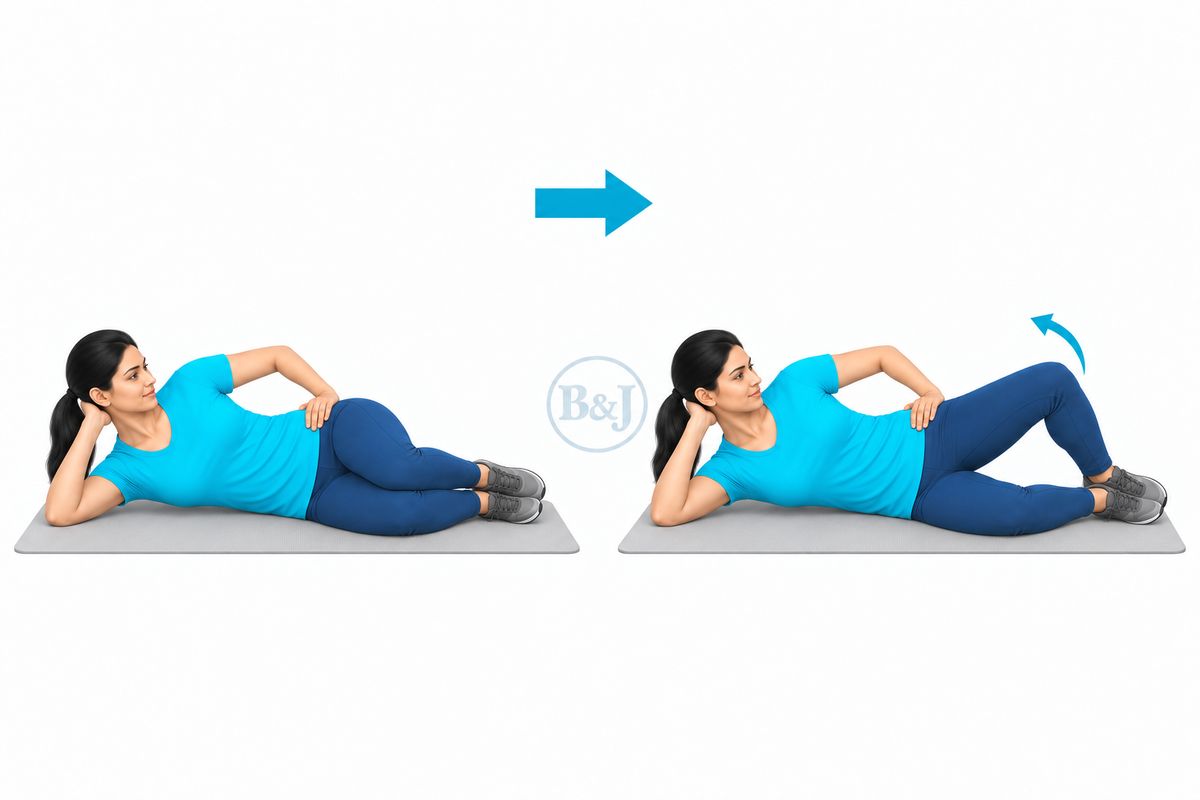
Lie on your side, knees bent. Lift the top knee, keeping the feet together and the hips still.
Should feel: The side of the buttock working Should not feel: The hips rolling back
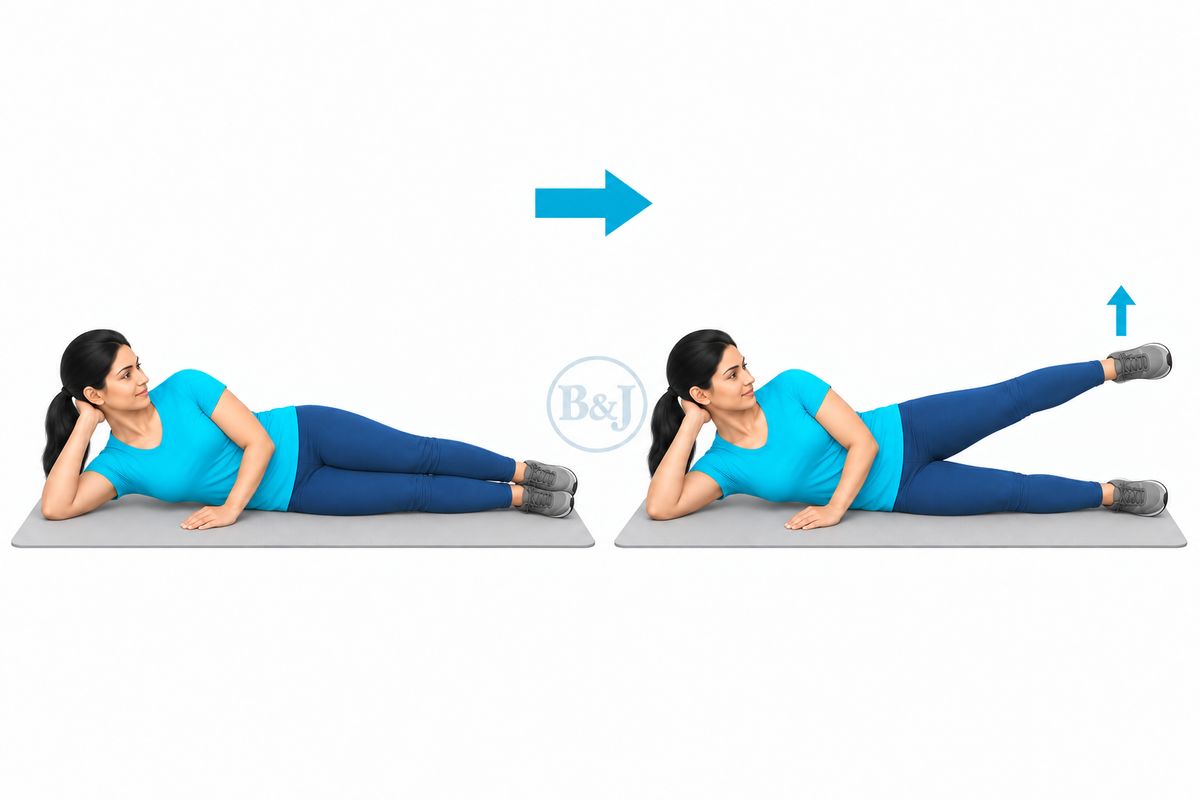
Lie on the UNAFFECTED side. Lift the top leg straight up.
Should feel: The side of the hip working Should not feel: Back pain
Not yet Twisting on the injured leg, running or jumping. Squatting, sitting on the floor or using an Indian toilet — until we have told you it is safe.
Move to the next stage only after we have seen you, and the X-ray if one was planned.
Get the knee bending fully, walk without a limp, and keep building the thigh and hip muscles. Carry on with the earlier exercises.
Weight bearing Full.
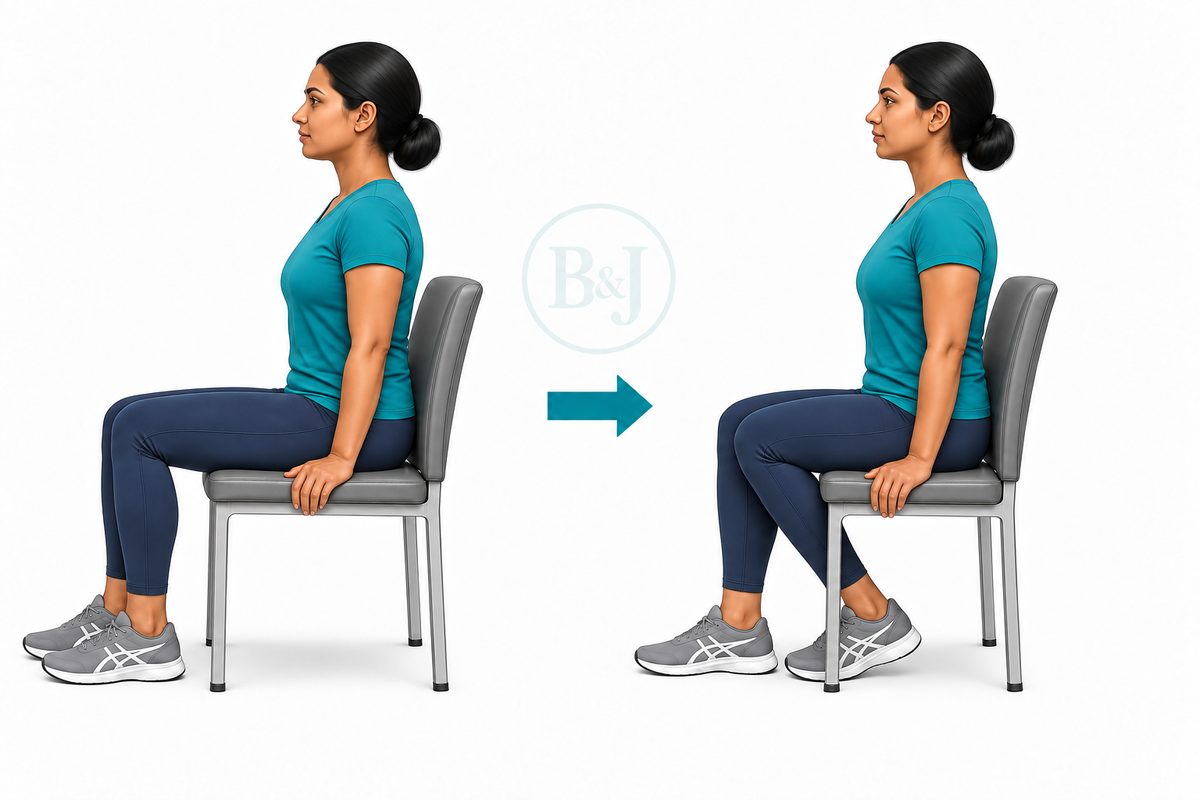
Sit on a firm chair. Slide the foot back under the chair to bend the knee, hold, then bring it forward.
Should feel: A stretch as the knee bends Should not feel: Sharp pain
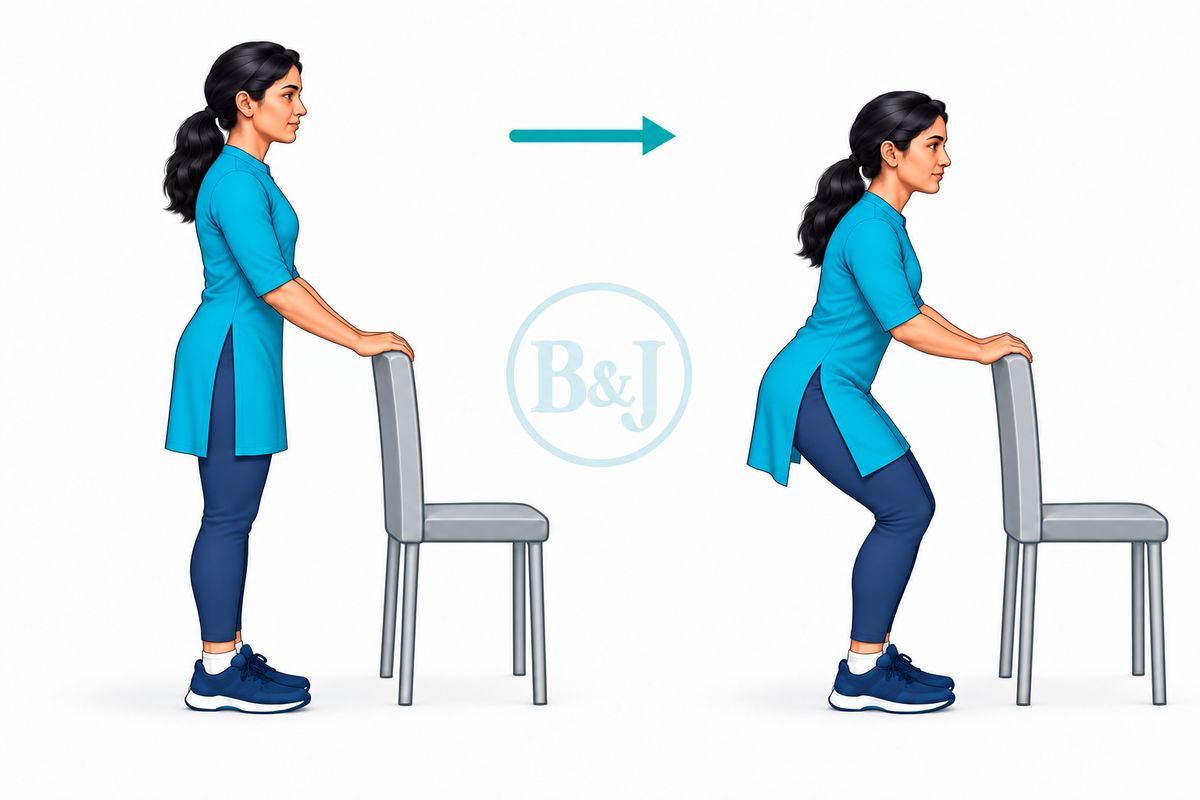
Hold a support and bend the knees a little way.
Should feel: The thighs working Should not feel: Knee pain
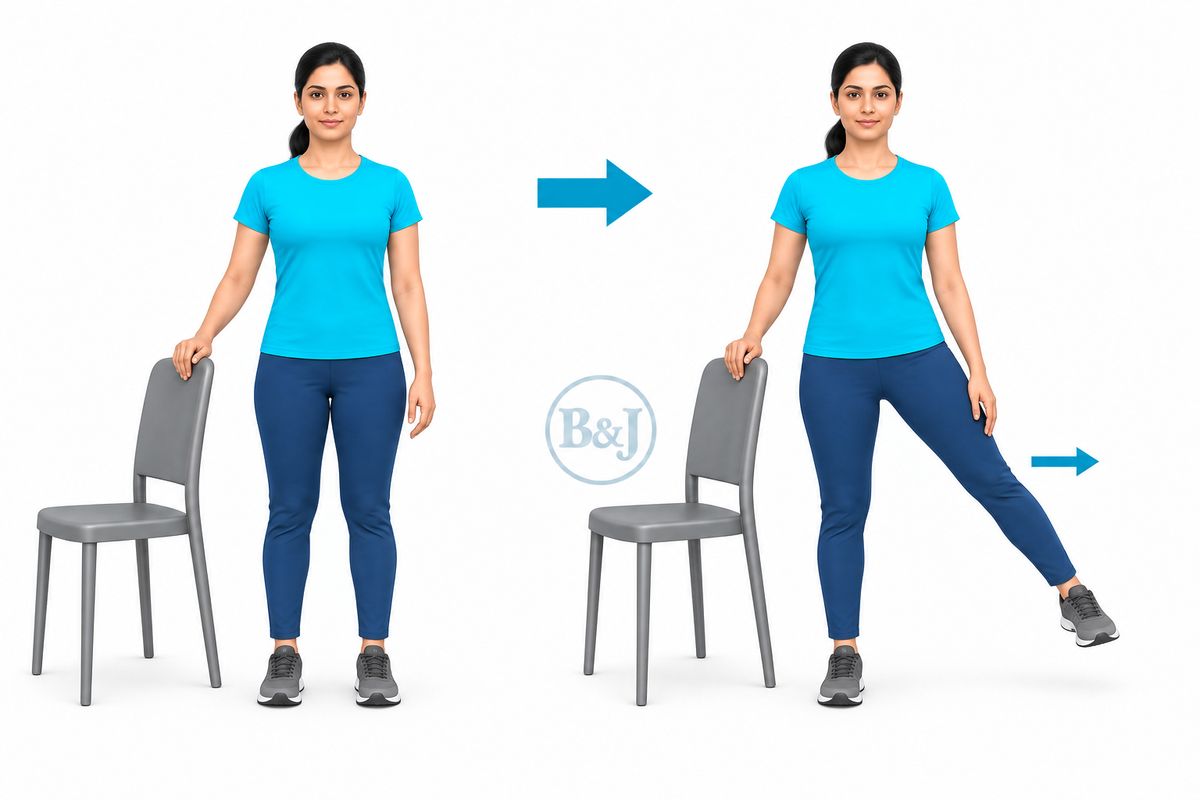
Hold a chair. Lift the leg out to the side, keeping the body upright.
Should feel: The side of the hip working Should not feel: Leaning over
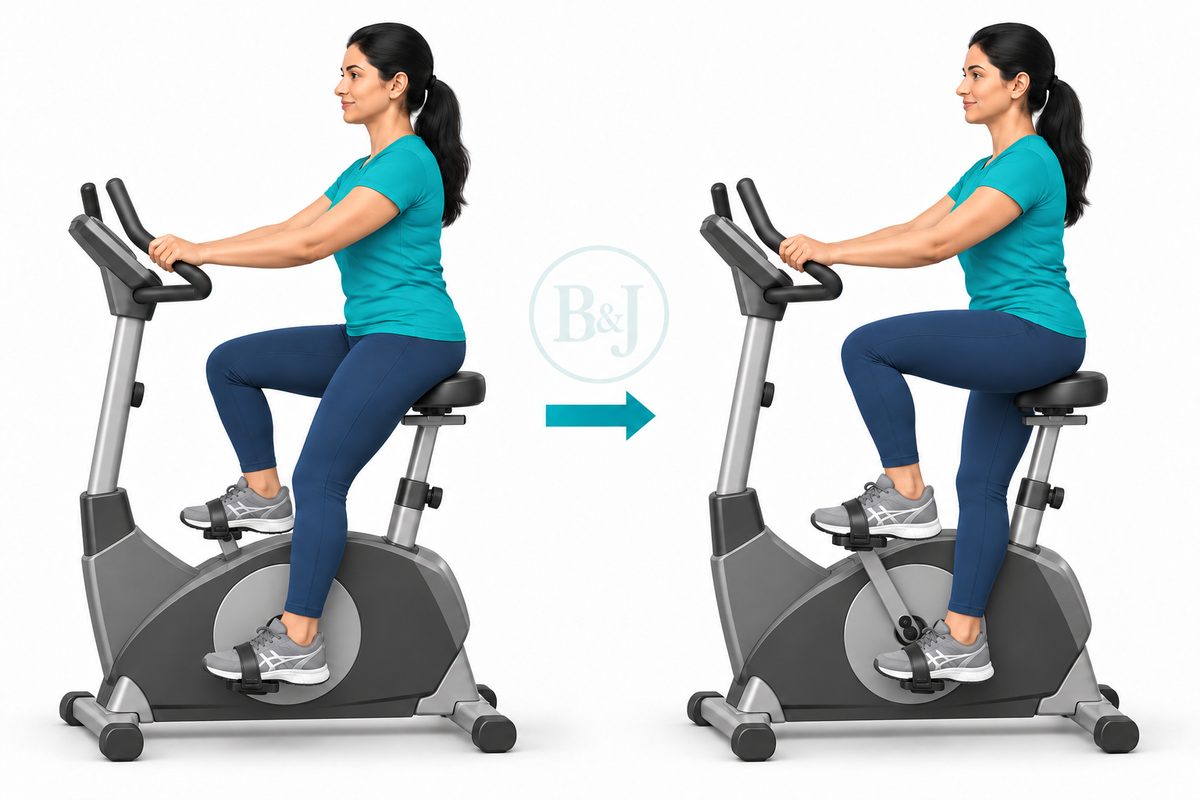
Set the seat high, so the knee is almost straight at the bottom. Pedal gently with little resistance.
Should feel: The knee moving freely Should not feel: Pain in the knee or hip
Not yet Running, jumping or turning sport. Squatting, sitting on the floor or using an Indian toilet — until we have told you it is safe.
Move to the next stage only after we have seen you, and the X-ray if one was planned.
Back to sport step by step, if we agree: straight-line jogging first, then turning and jumping sport, usually from about 3 to 6 months, once the injured thigh is about as strong as the other. Carry on with the third-stage exercises.
Weight bearing Full.
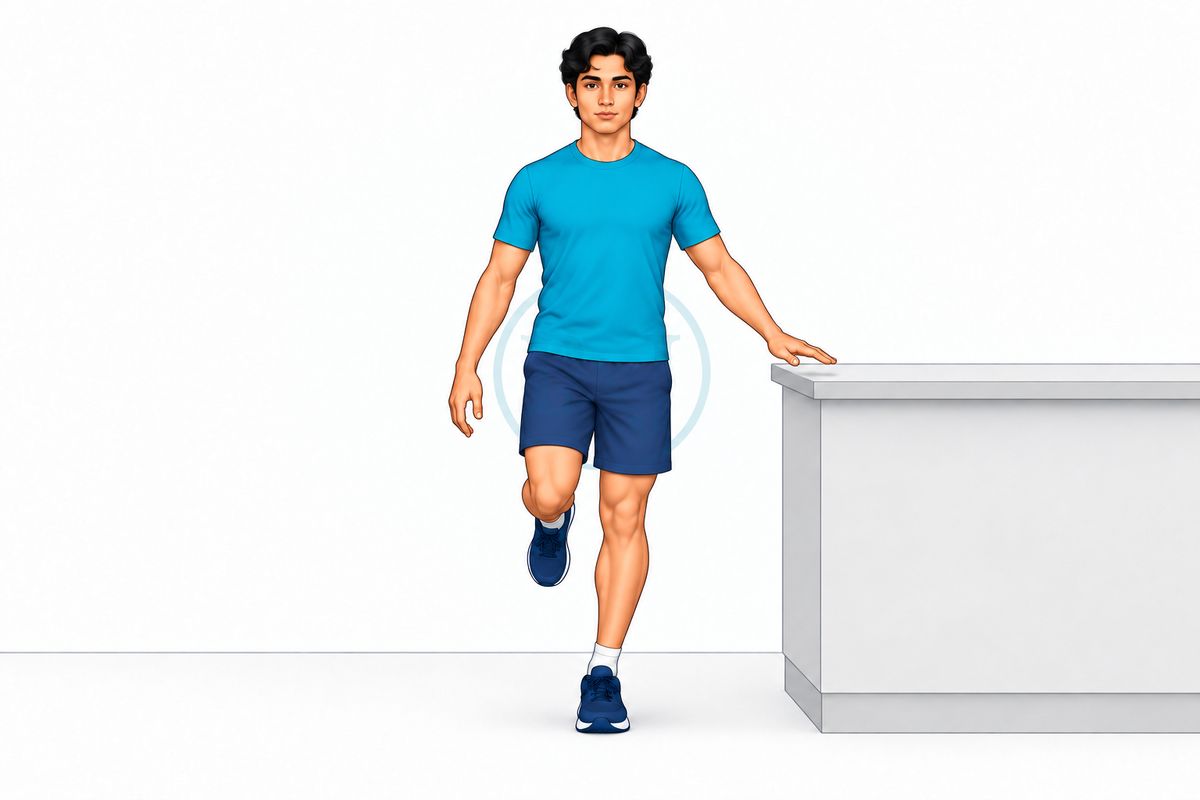
Stand on one leg. Progress to eyes closed.
Should feel: Steady control Should not feel: The knee giving way
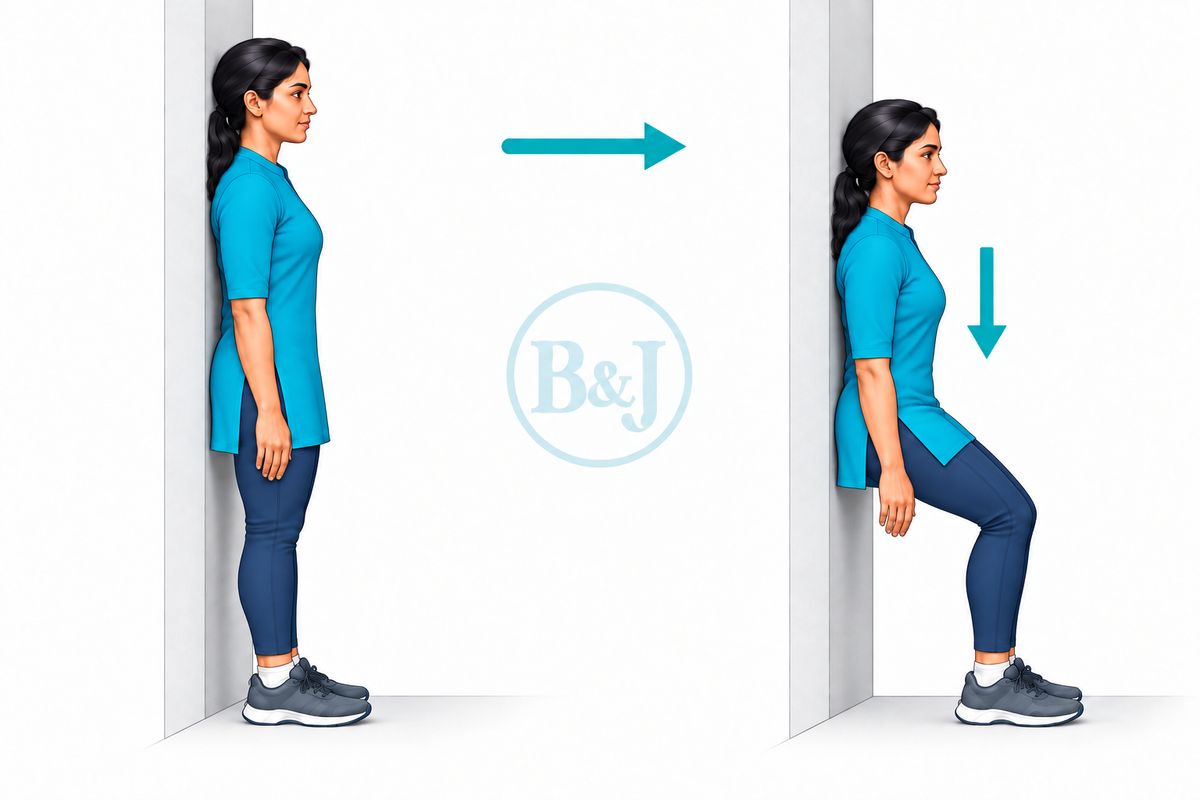
Back against a wall, slide down a little way, hold, then stand.
Should feel: The thighs working Should not feel: Knee pain at the front
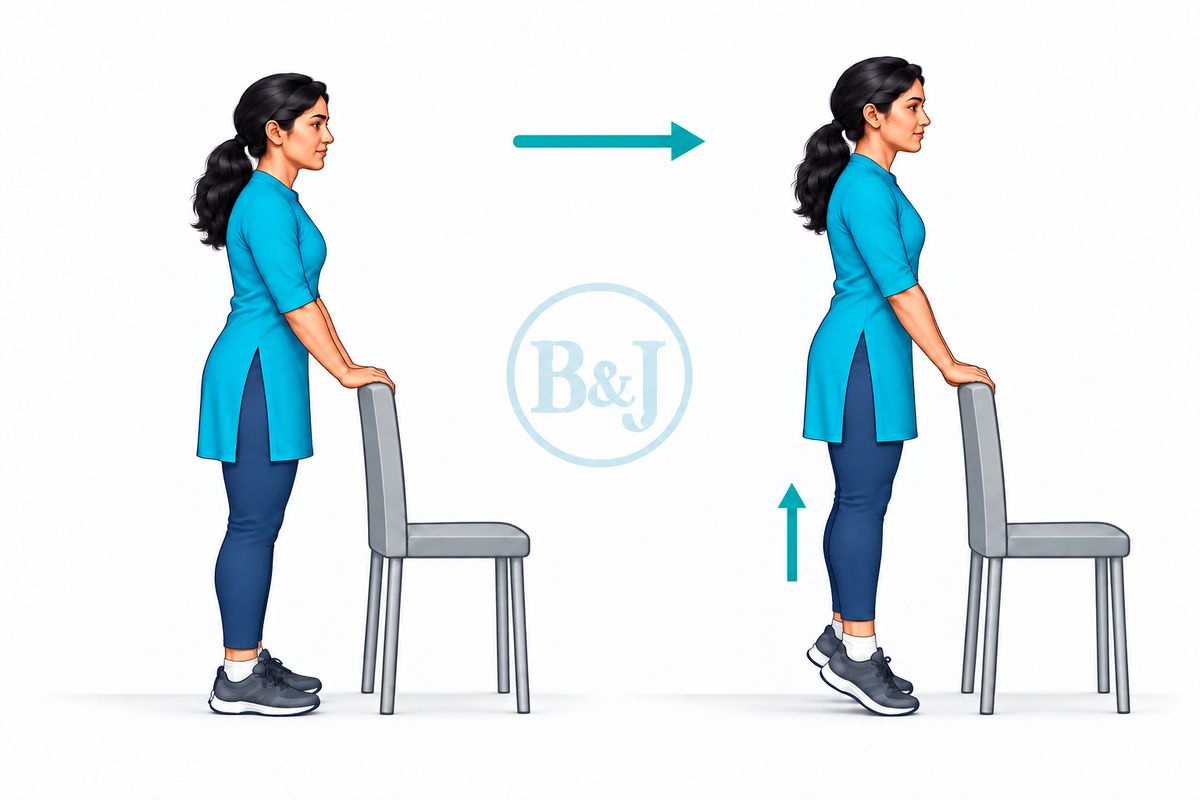
Rise onto both toes and lower under control.
Should feel: The calf working Should not feel: Sharp pain
Not yet Football, kabaddi, cricket fielding or other turning and contact sport until we clear you.
Call either clinic during consulting hours, or send a WhatsApp message any time.