
Toe wiggles
Curl the toes down, then spread them and pull them up, as far as the plaster allows.
- 10 times
- Every hour while awake
Home / Patient library / Exercise sheets / Sheet 77
Foot & ankle · After surgery on a broken bone
Count the weeks from the day of your operation. The date is on your discharge card.
If your doctor wrote a different plan on your prescription, follow that instead of this page.
A4 PDF, 0.8 MB. Free to download — no sign-up, no email address needed.
Bring the swelling down: keep the ankle above the level of the hip most of the day. Keep the plaster or boot on and dry. Keep the toes, knee and hip moving. If we prescribed blood-thinning injections or tablets, take every dose.
Weight bearing As written on your prescription. Use the walker or crutches every time.
Curl the toes down, then spread them and pull them up, as far as the plaster allows.
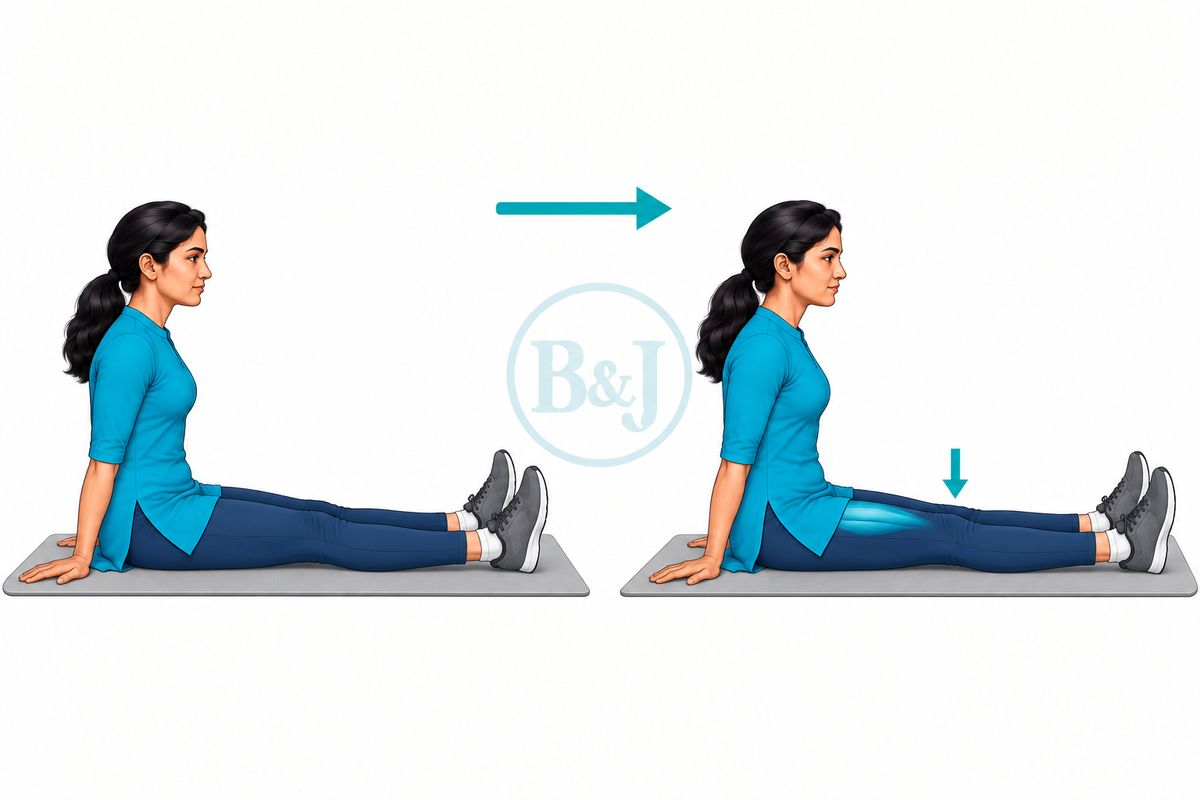
Sit with the leg straight. Press the back of the knee down and tighten the thigh.
Should feel: The thigh muscle tightening Should not feel: Knee pain
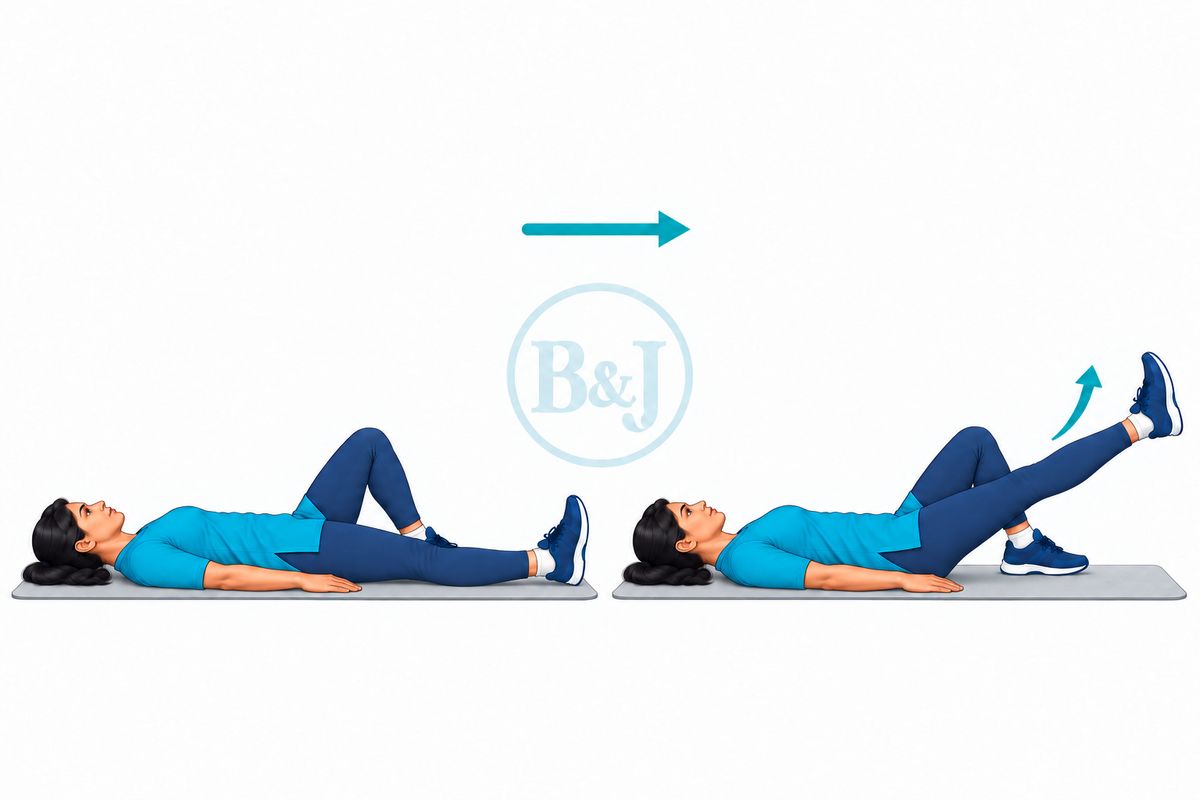
Lie down, one knee bent. Keep the other knee straight and lift the leg 20 cm.
Should feel: The thigh working Should not feel: The knee bending or back pain
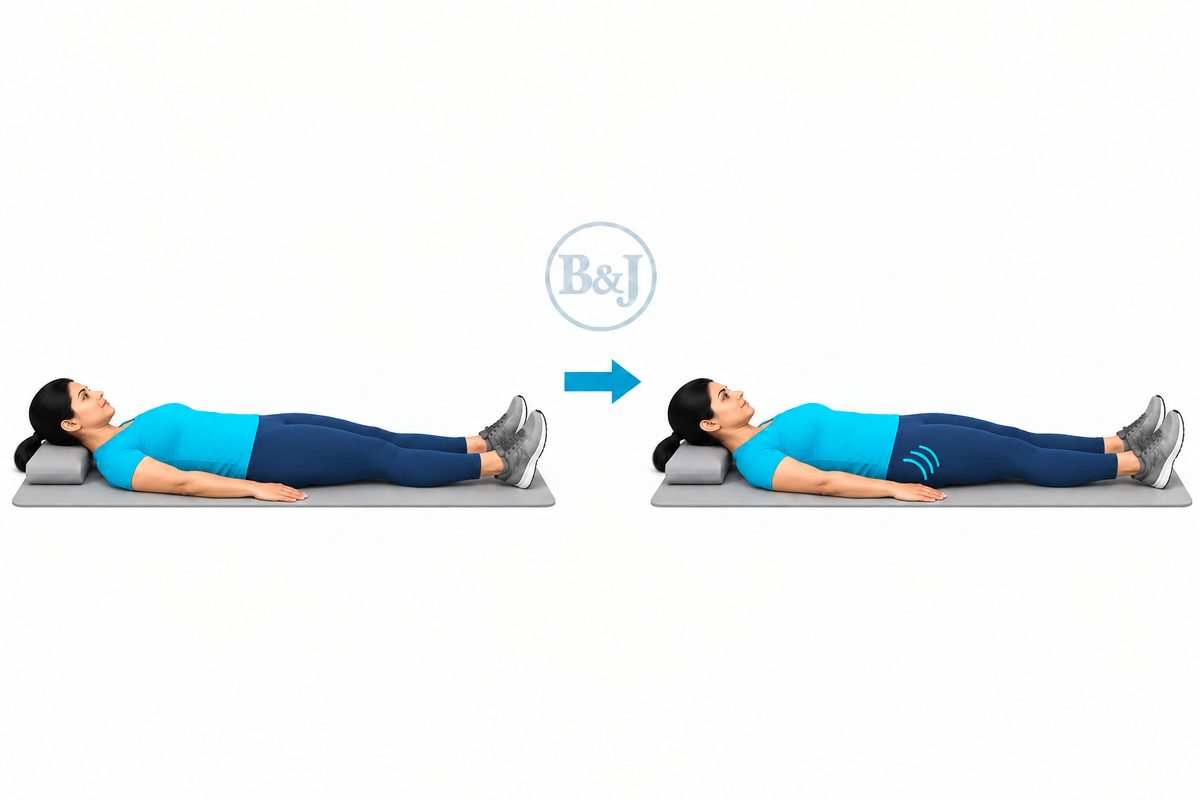
Lie on your back with the legs straight. Squeeze the buttocks together, hold, then relax.
Should feel: The buttocks tightening Should not feel: Back pain
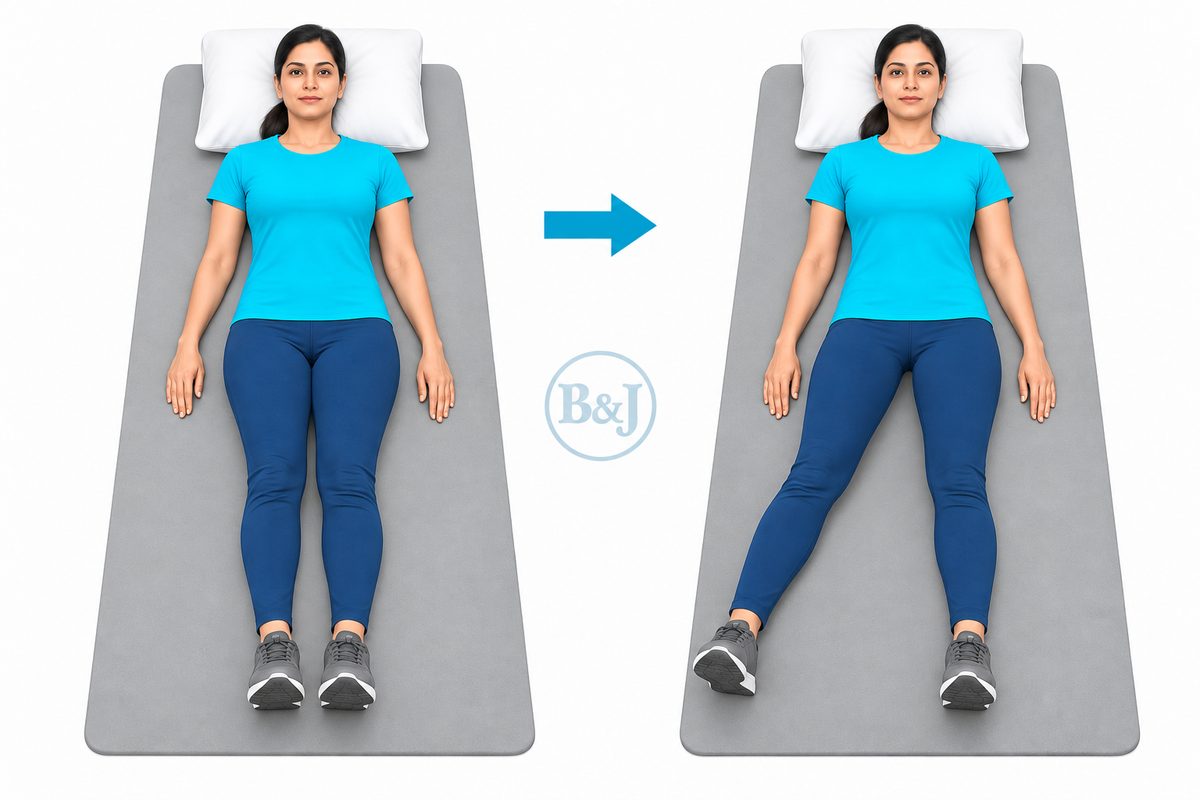
Lie on your back, legs straight, toes pointing up. Slide the leg out to the side and back, keeping the knee straight.
Should feel: The side of the hip working Should not feel: The toes rolling outwards
Not yet Letting the leg hang down for long, walking on the operated leg unless we have allowed it, getting the plaster or the wound wet, or driving.
Move to the next stage only after we have seen you, and the X-ray if one was planned.
Stitches out. If we have moved you into a removable boot, take it off to exercise the ankle and to wash, and wear it to walk. Carry on with the earlier exercises.
Weight bearing As written on your prescription. It increases as the X-ray shows healing.
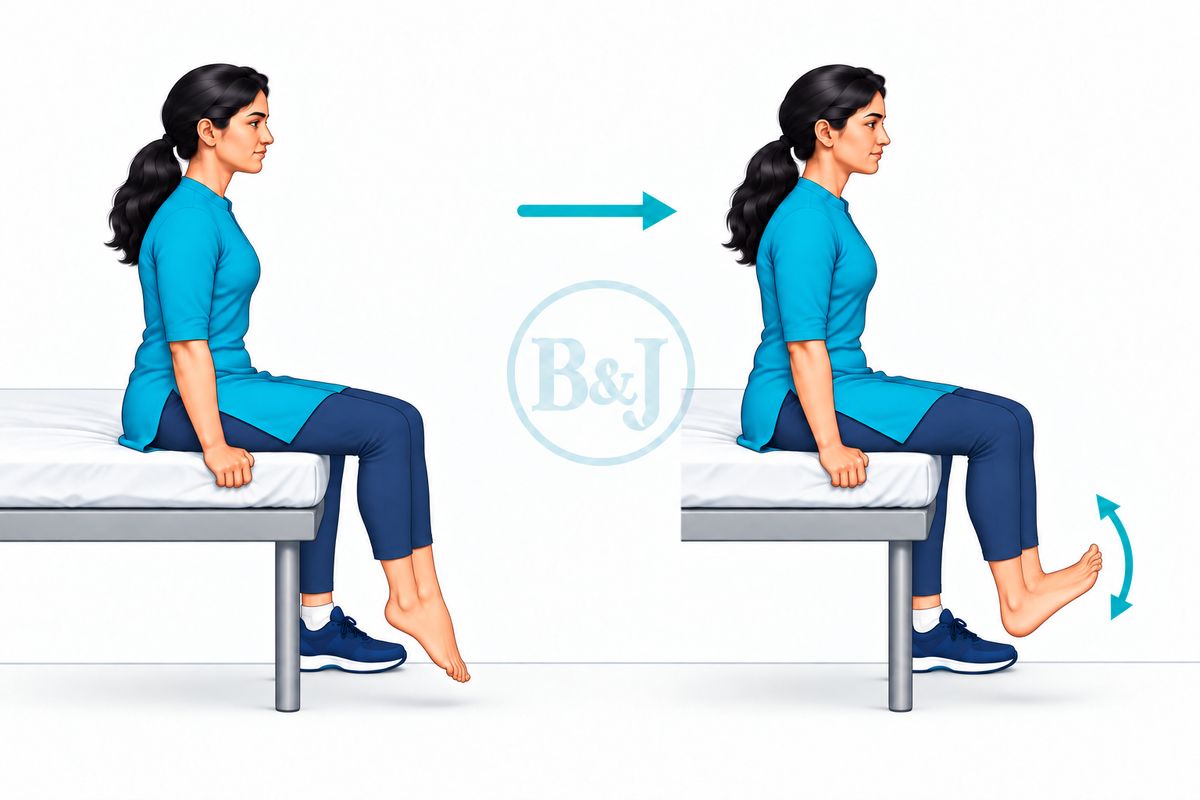
Pump the feet up and down to keep the blood moving.
Should feel: The calf working Should not feel: Calf pain or swelling — tell us
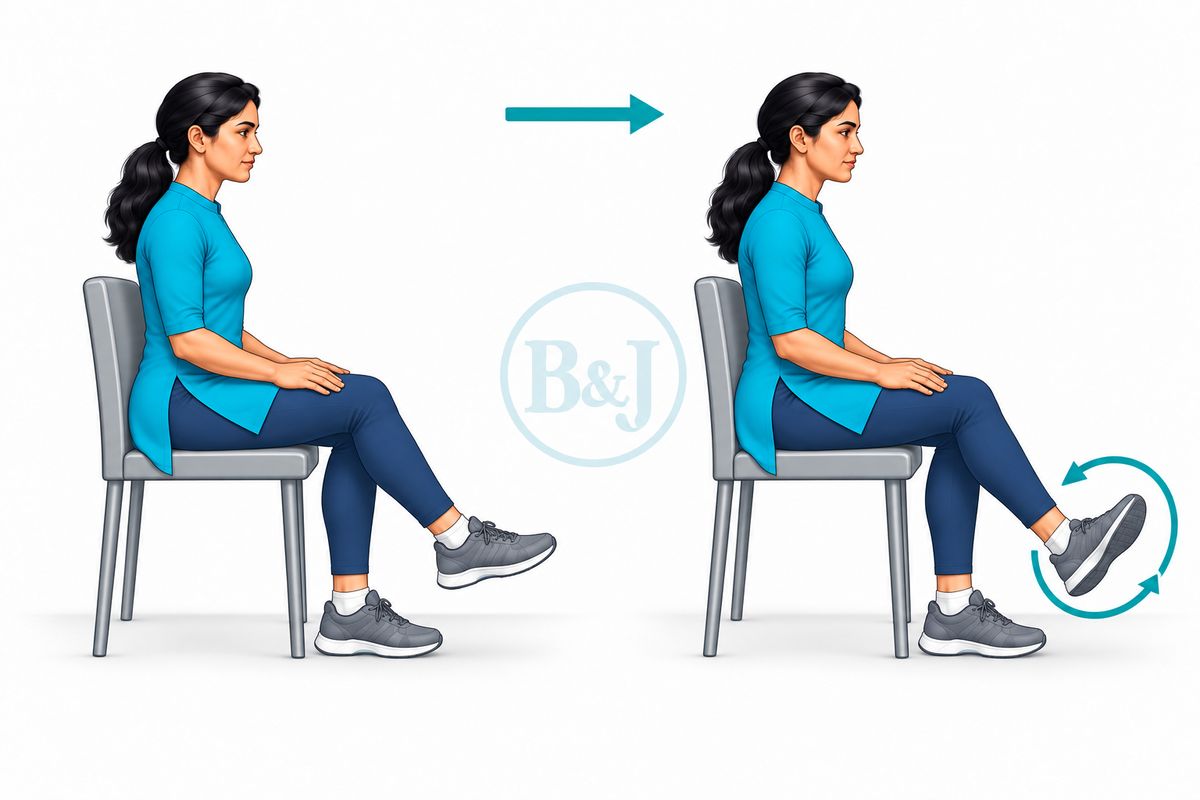
Move the ankle slowly in circles both ways.
Should feel: The ankle loosening Should not feel: Sharp pain
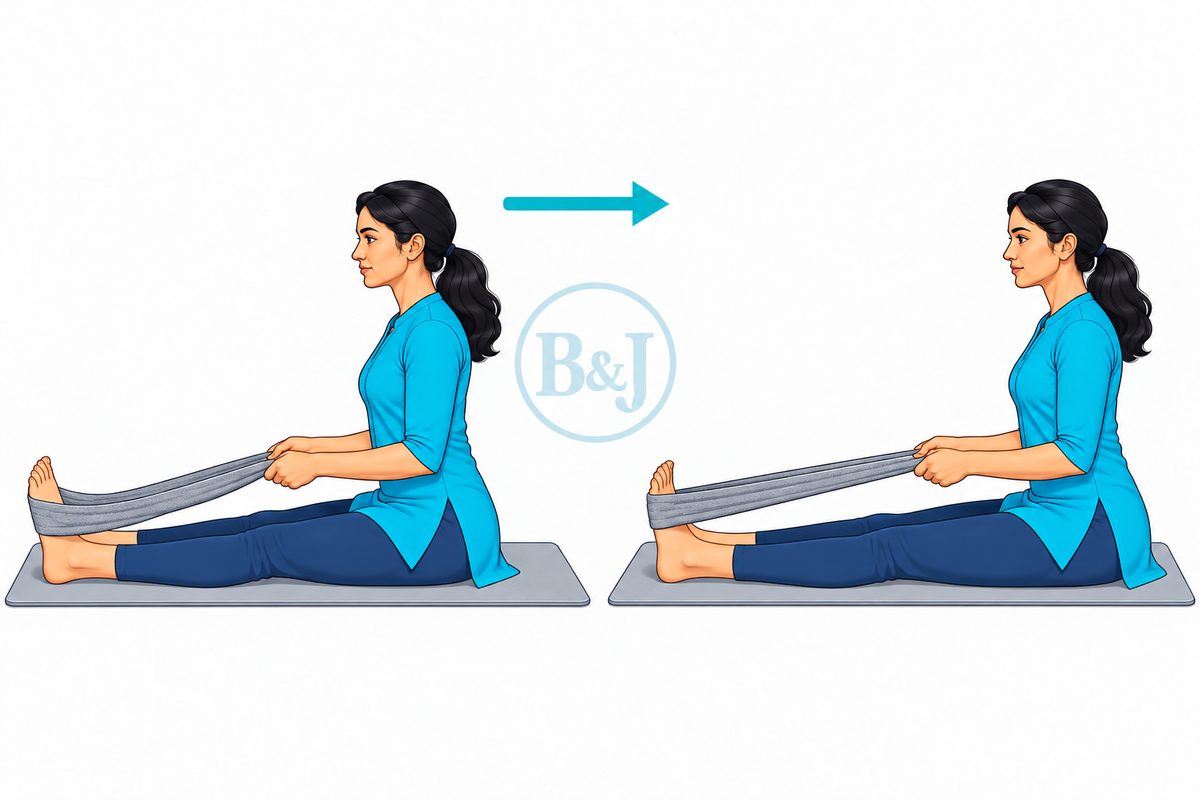
Sit with the leg straight. Loop a towel round the ball of the foot and pull the toes towards you.
Should feel: A stretch in the calf Should not feel: Sharp pain
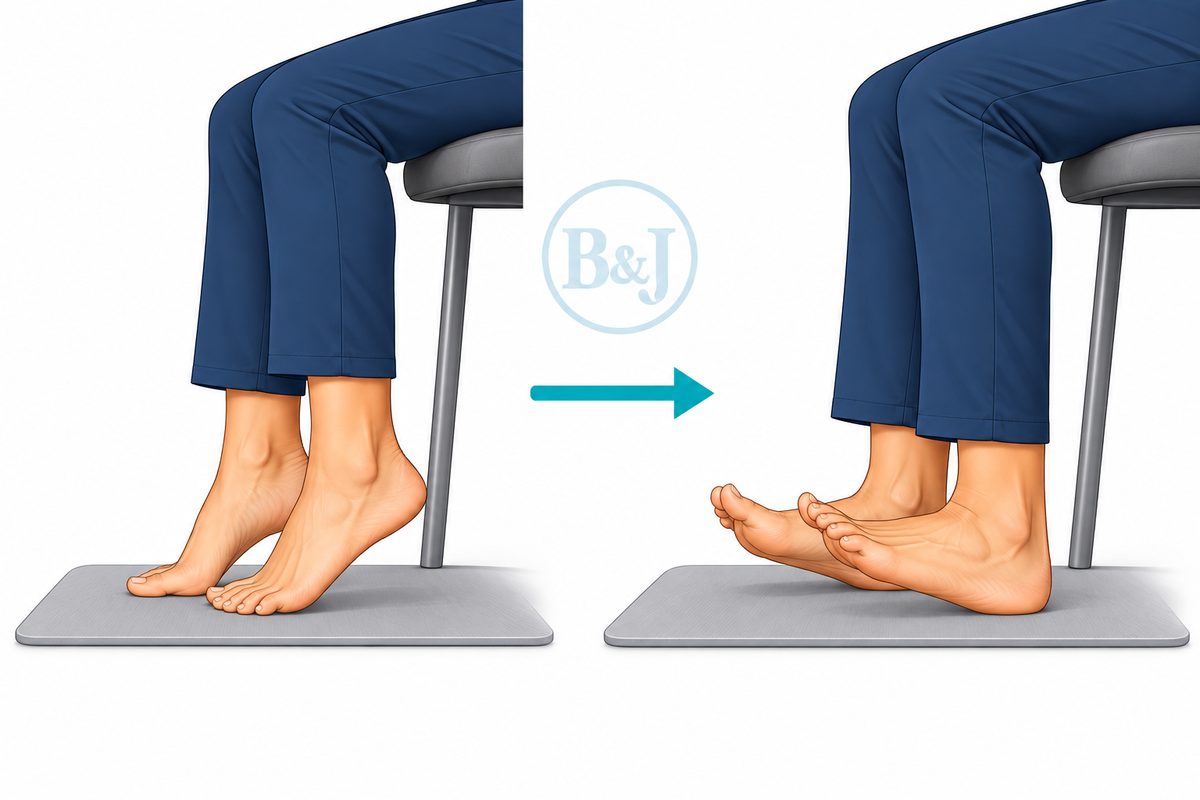
Sit with both feet flat on the floor. Lift the heels, lower them, then lift the toes.
Should feel: The calf and the front of the shin working Should not feel: Sharp pain
Not yet Walking without the boot, running or jumping.
Move to the next stage only after we have seen you, and the X-ray if one was planned.
Out of the boot as we advise. Walk without a limp; build calf strength and balance. Ankle swelling by evening is normal and can last for some months. Carry on with the earlier exercises.
Weight bearing Full, unless we have told you otherwise.
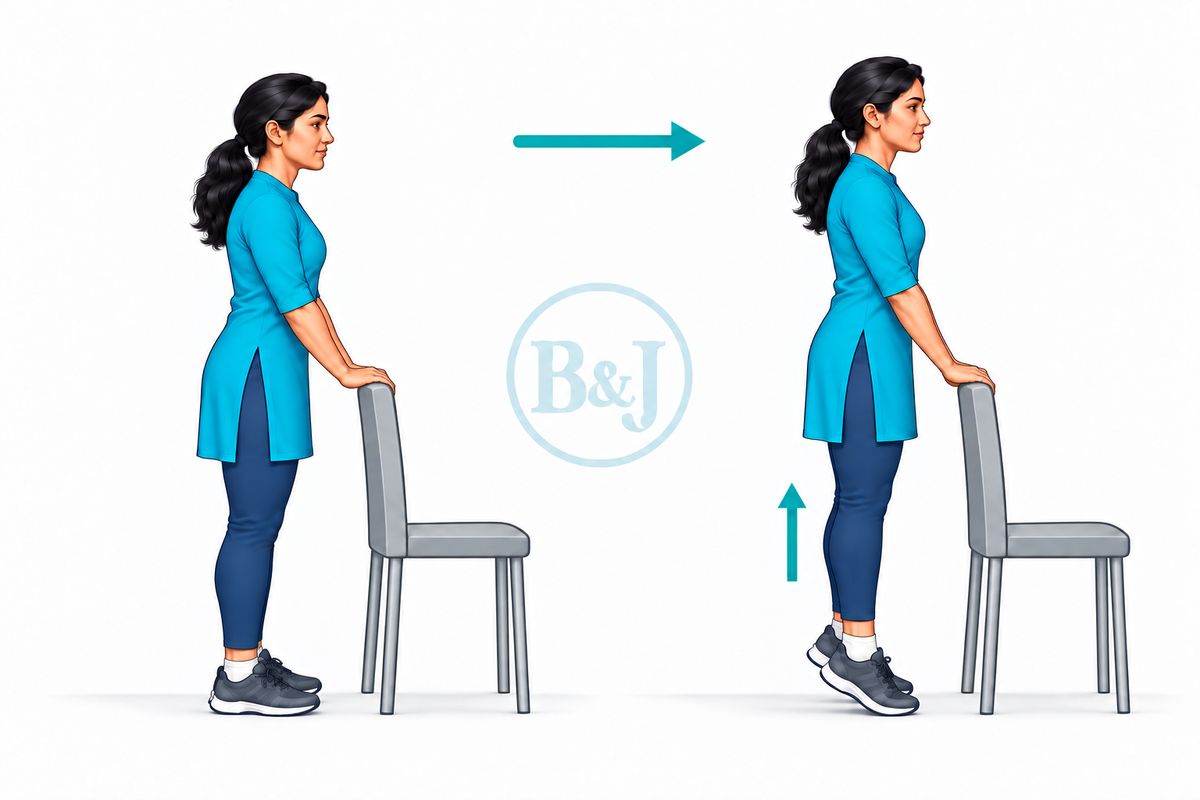
Rise onto both toes and lower under control.
Should feel: The calf working Should not feel: Sharp pain
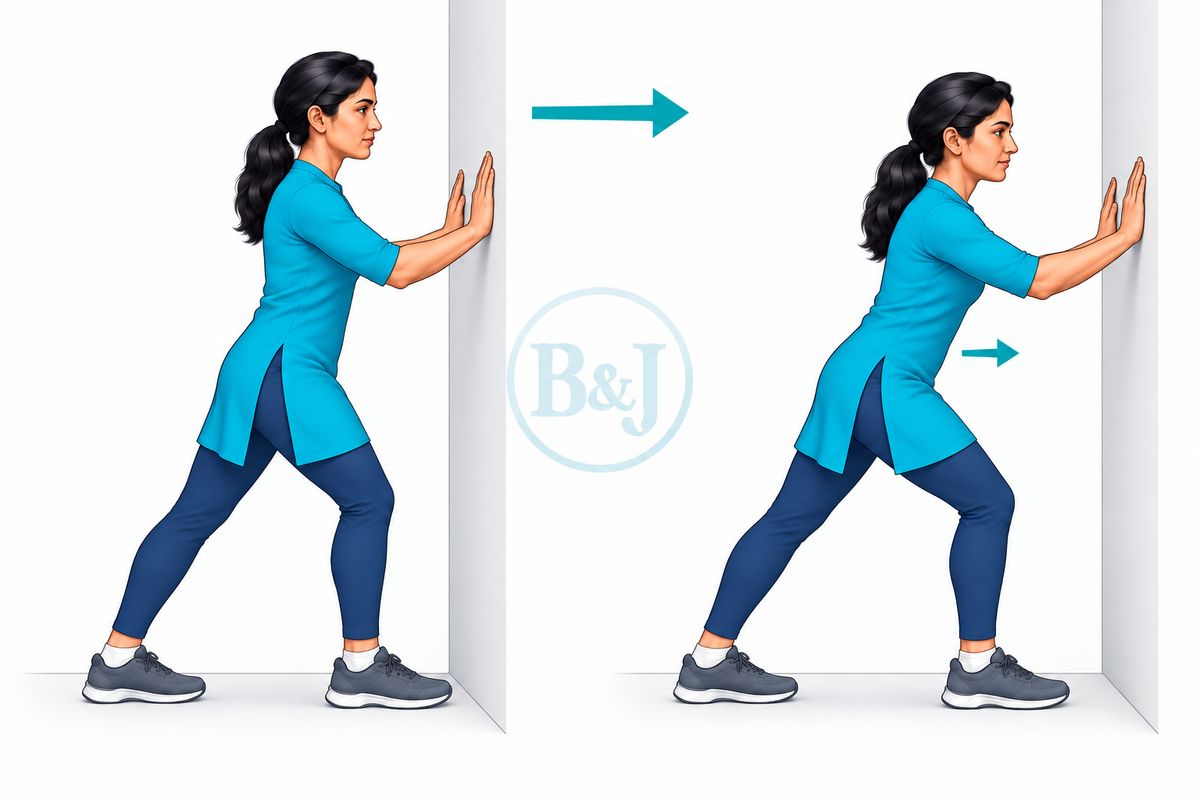
Hands on a wall, back leg straight, heel down.
Should feel: A stretch in the upper calf Should not feel: Pain in the heel
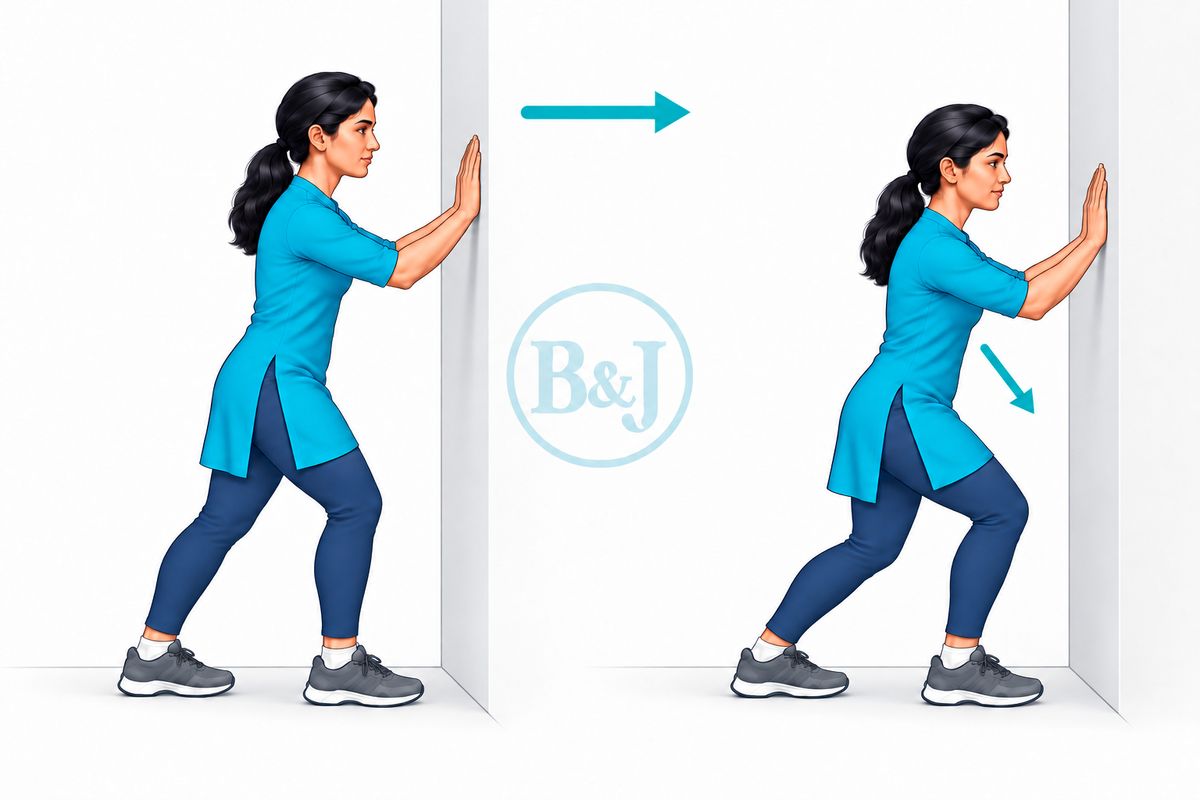
The same position but bend the back knee slightly.
Should feel: A stretch lower down Should not feel: Sharp pain
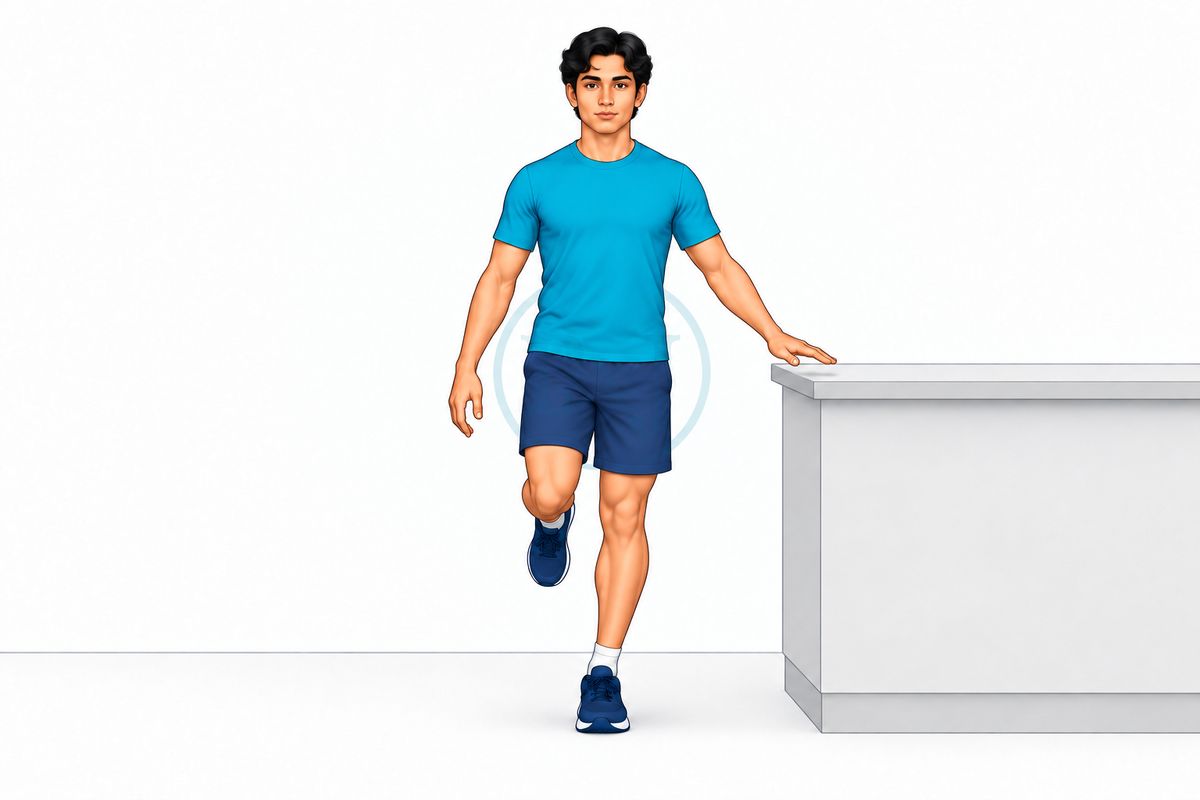
Stand on one leg beside a worktop. Balance prevents falls, and preventing falls prevents fractures.
Should feel: Working to stay steady Should not feel: Losing balance — hold on
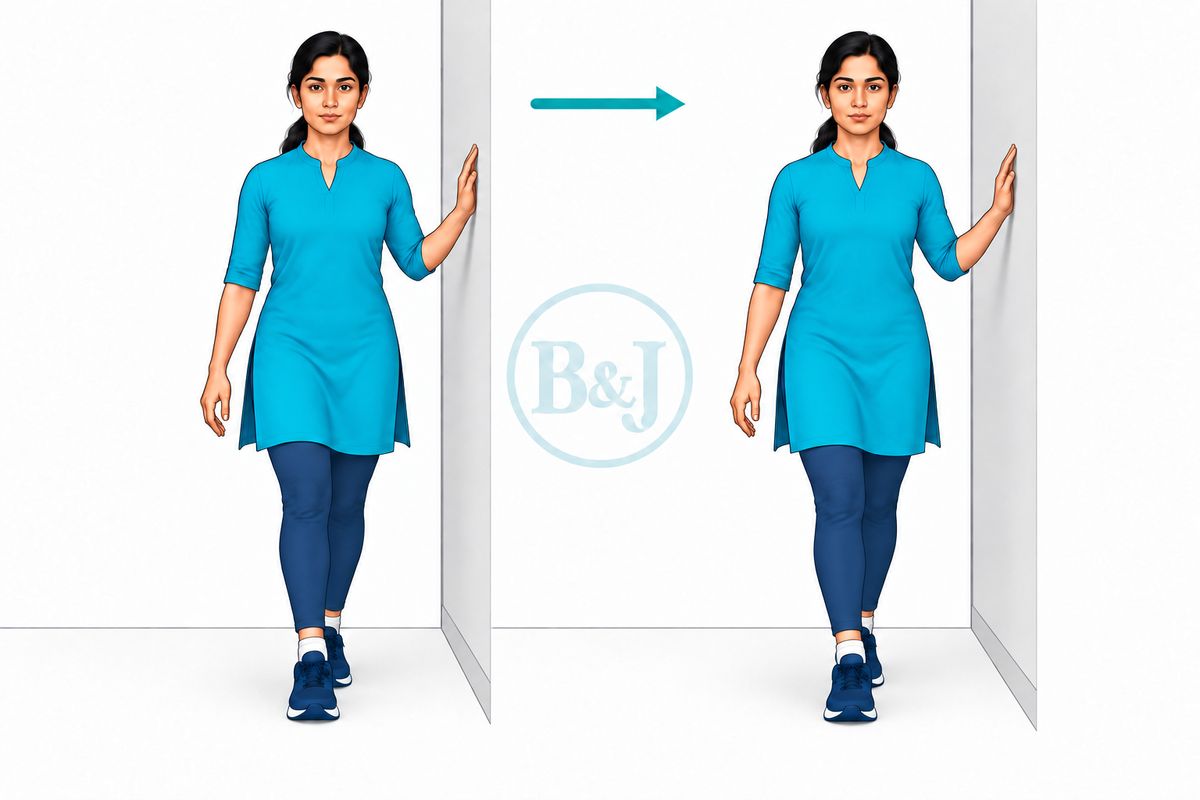
Walk heel to toe along a line, beside a support.
Should feel: Steadier walking Should not feel: Wobbling — use the wall
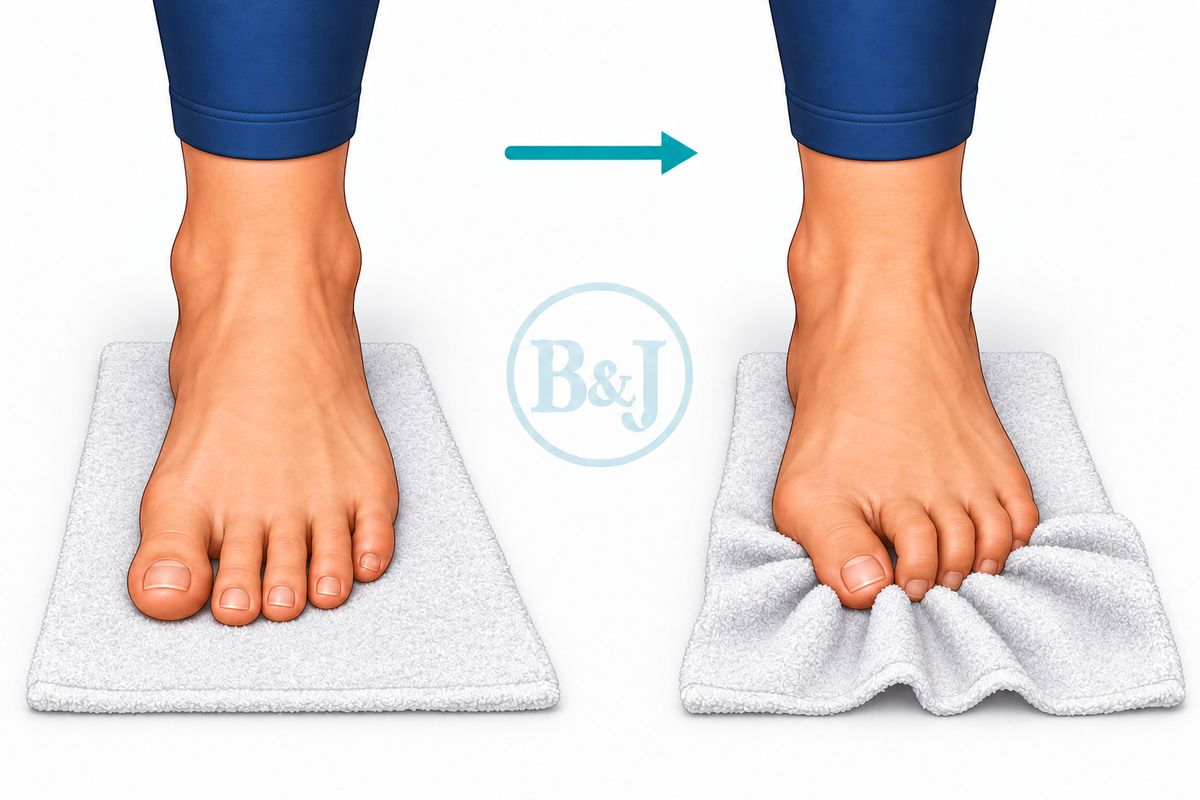
Scrunch a towel with the toes.
Should feel: The foot muscles working Should not feel: Cramp
Not yet Running, jumping or heavy manual work.
Move to the next stage only after we have seen you, and the X-ray if one was planned.
Back to work and sport, as the X-ray shows. Carry on with the third-stage exercises.
Weight bearing Full.
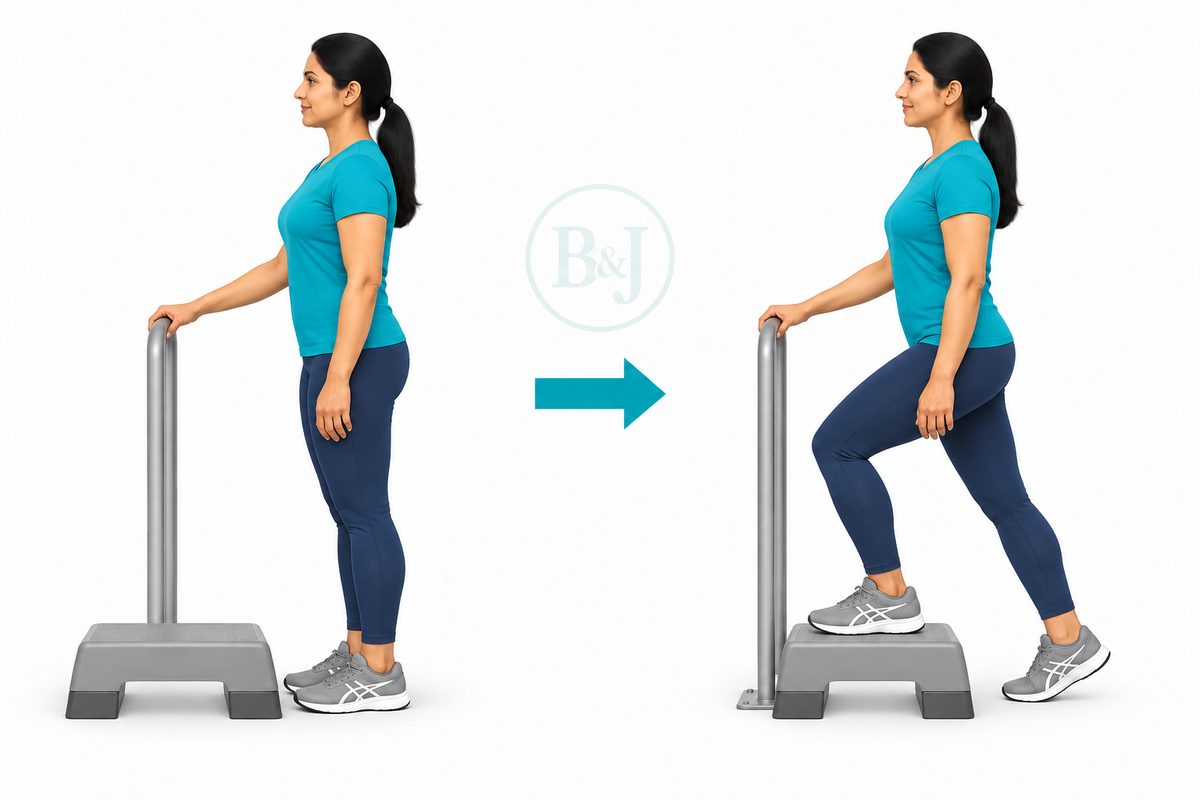
Hold a rail. Step up onto a low step with the operated leg, then step down with the other leg.
Should feel: The thigh working Should not feel: The knee falling inwards
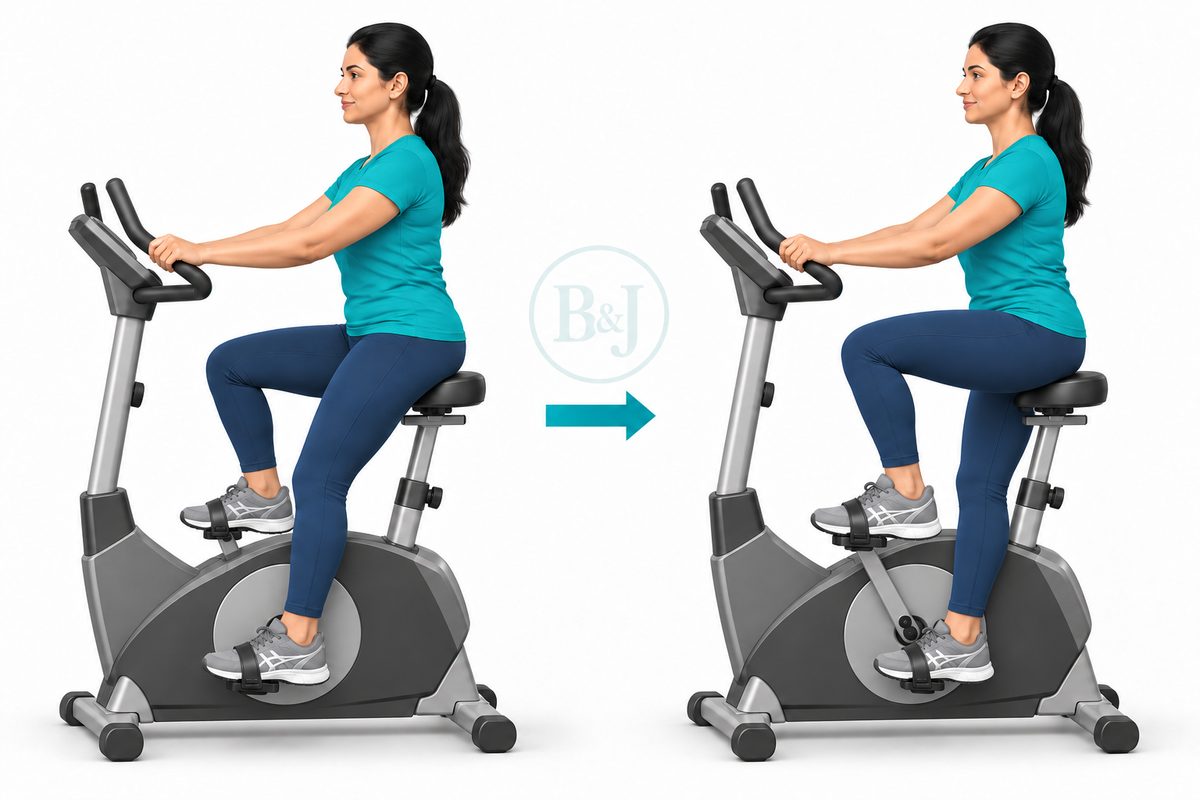
Set the seat high, so the knee is almost straight at the bottom. Pedal gently with little resistance.
Should feel: The knee moving freely Should not feel: Pain in the knee or hip
Not yet Contact sport until we clear you.
Call either clinic during consulting hours, or send a WhatsApp message any time.