A4 PDF, 0.8 MB. Free to download — no sign-up, no email address needed.
Weeks 0–2
Let the wound heal. Keep the stump bandaged as we showed you, and keep the hip and knee straight when you lie and sit. Get out of bed from the first days, with help and a walker, and learn to move safely between bed, chair and toilet. Pump the ankle of the other foot often to protect against clots. Feeling that the missing part of the leg is still there is common and normal after an amputation.
Weight bearingNone through the stump. Full on the other leg, with a walker, as we showed you.
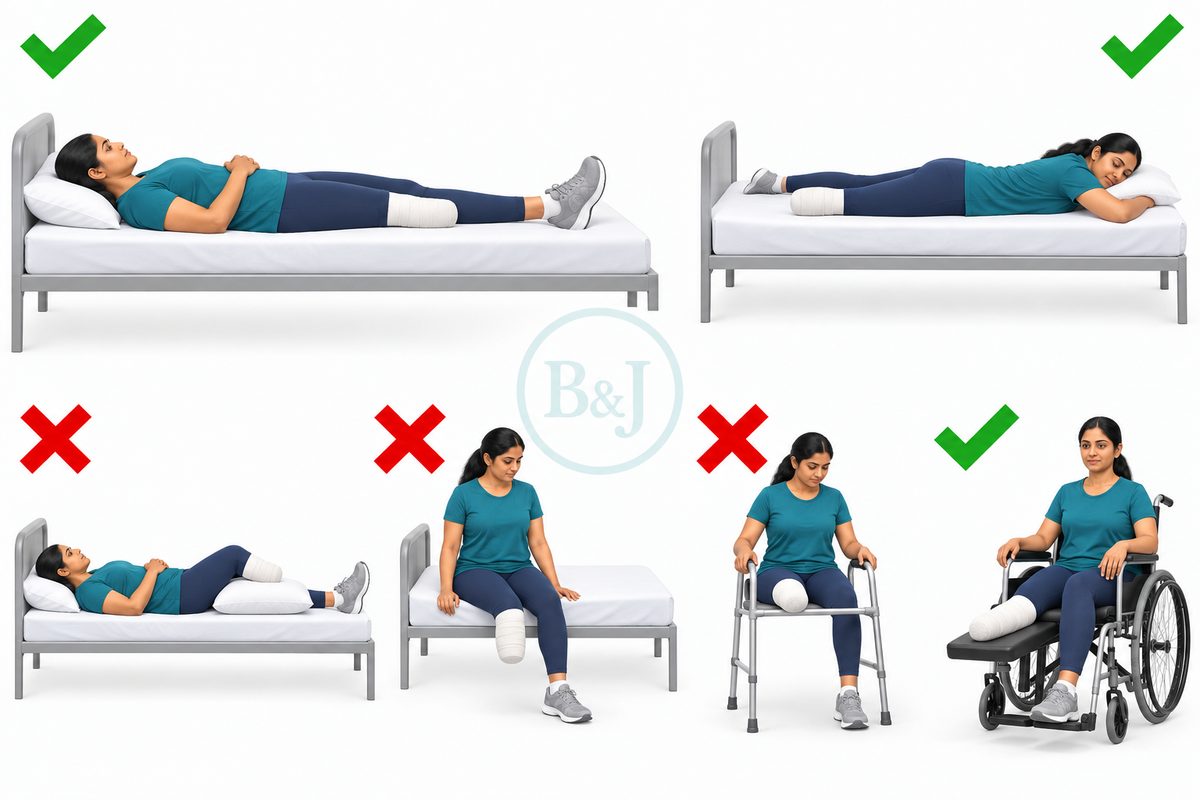
Lying and sitting with the stump straight
Lie flat with the stump straight on the bed. Never put a pillow under the stump or the knee, or between the thighs, never let the stump hang over the edge of the bed, and do not rest it on the walker or crutch handle. After a below-knee amputation, sit with the knee kept straight on the board or chair we advised, and do not sit for long hours. If you can, lie on your front for a while a few times a day.
All day
Every day
Should feel: The hip and knee staying straightShould not feel: The hip or knee getting stiff in a bent position — tell us
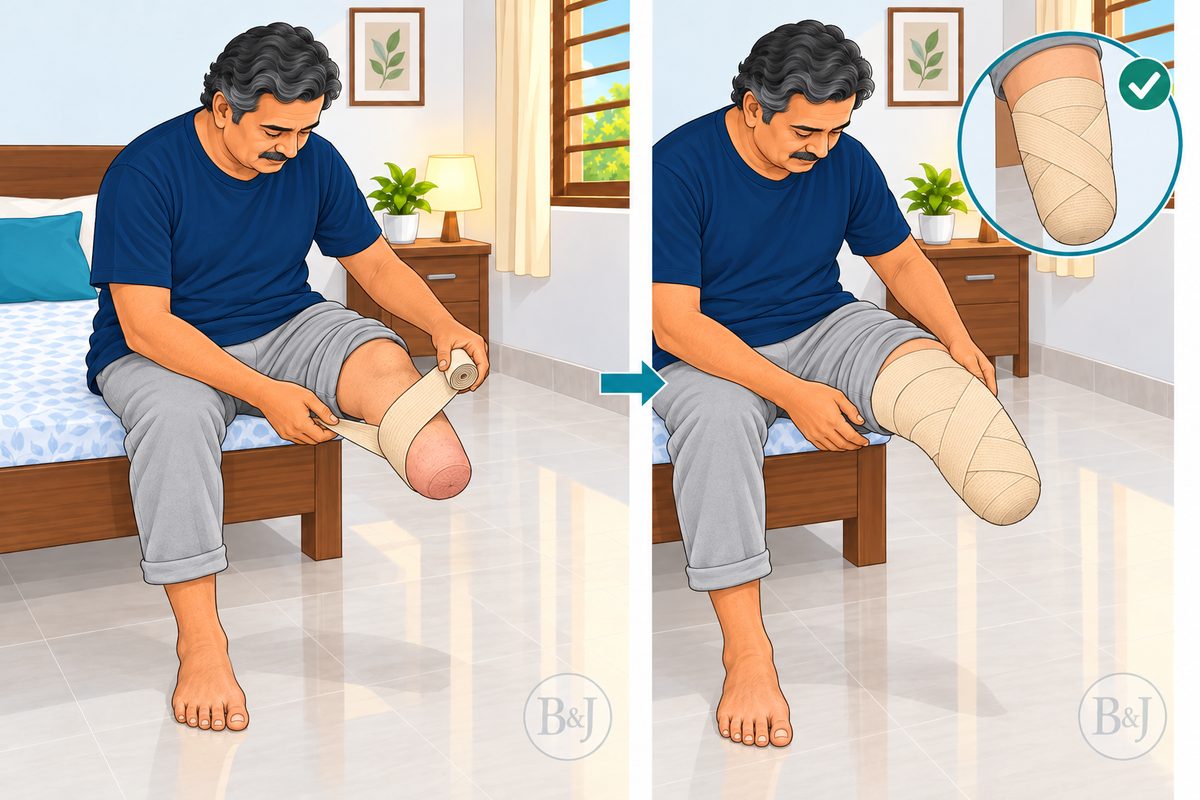
Bandaging the stump
Use the elastic bandage exactly as we showed you. Start at the end of the stump and wrap upwards in a figure of eight, firmest at the end and looser towards the top, with no creases and never a tight band round the top. Re-wrap it whenever it loosens, and wear it day and night except when washing. If the wound is still open or leaking, bandage only as we have shown you for that wound.
All day
Ask us when to stop
Should feel: Firm, even pressure, tightest at the end of the stumpShould not feel: Throbbing, numbness, or a tight band at the top — unwrap it and start again
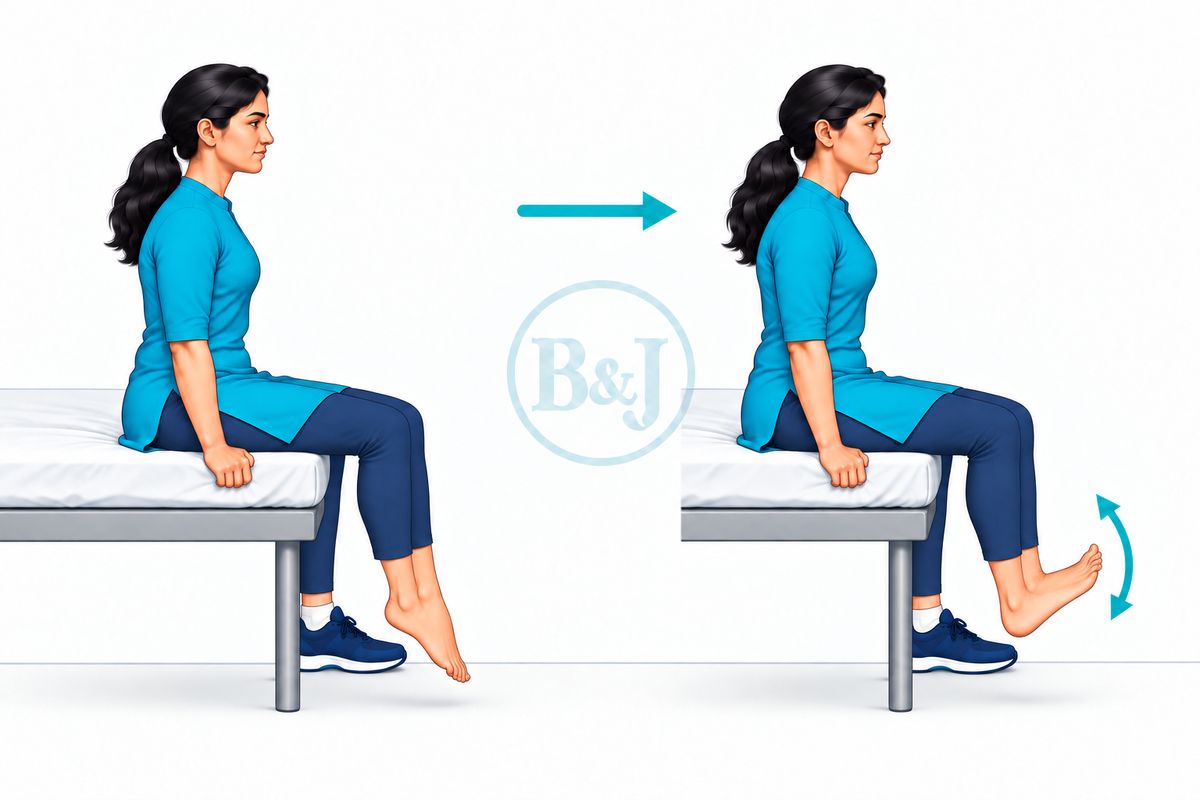
Ankle pumps
Pump the foot of the other leg up and down to keep the blood moving.
20 times
Every hour while awake
Should feel: The calf workingShould not feel: Calf pain or swelling — tell us
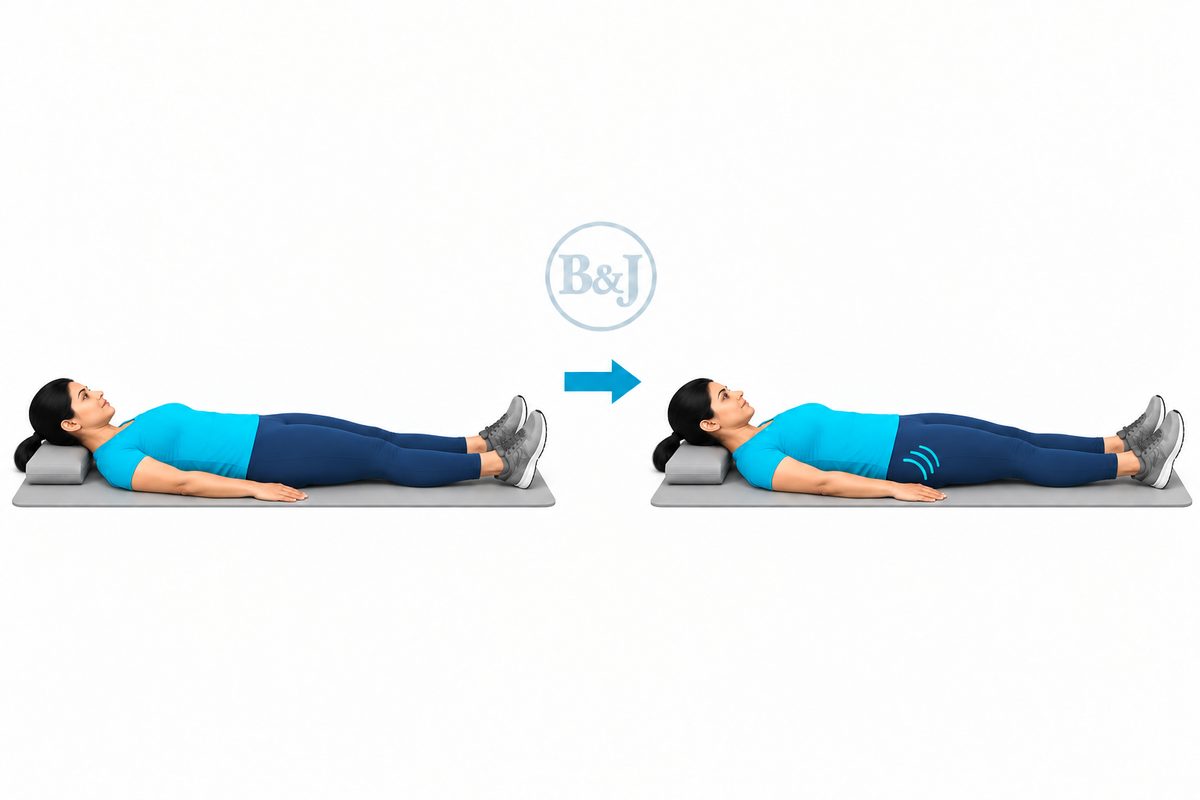
Buttock squeeze
Lie on your back with the legs straight. Squeeze the buttocks together, hold, then relax.
Hold 5 seconds
10 times
3 times a day
Should feel: The buttocks tighteningShould not feel: Back pain
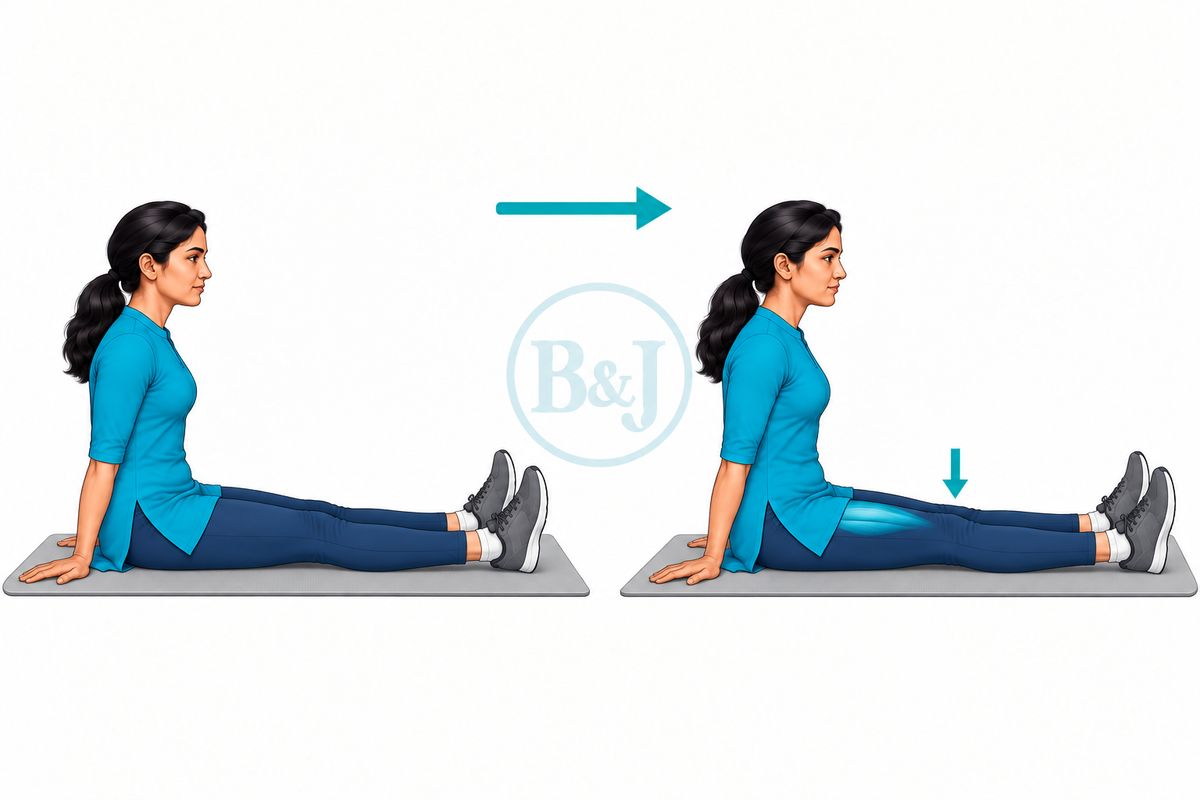
Quad sets
Lie or sit with the stump straight on the bed. Tighten the thigh muscle of the stump, hold, then relax. Then do the same with the other leg.
Hold 5 seconds
10 times
3 times a day
Should feel: The thigh workingShould not feel: Sharp pain in the stump — tell us
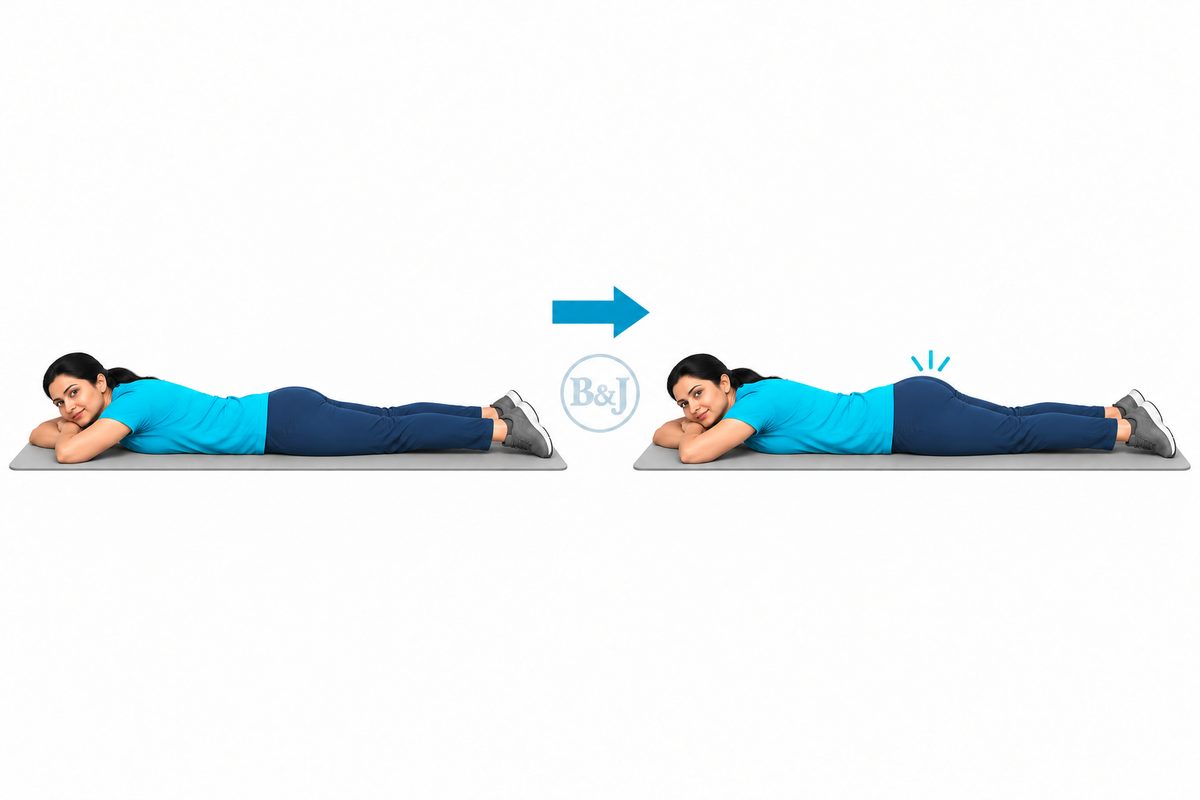
Lying on the front, buttock squeeze
Lie on your front with the legs straight. Squeeze the buttocks and press the hips into the bed, hold, then relax.
Hold 5 seconds
10 times
3 times a day
Should feel: The buttocks working and the front of the hip stretchingShould not feel: Back pain
Not yetA pillow under the stump or the knee, or between the thighs. Letting the stump hang over the edge of the bed, or resting it on the walker or crutch. Sitting for long hours with the hip and knee bent. Any weight through the stump.
Move to the next stage only after we have seen you, and the X-ray if one was planned.
Weeks 2–6
Stitches out once the wound has healed. Keep bandaging the stump day and night, to shape it for an artificial leg. Check the stump skin every day. Once the wound has healed, touch, tap and gently rub the stump with your own hand each day, so it gets used to touch — gently, never forceful massage, and no bone-setter. Pain felt in the missing part of the leg (phantom pain) is common and often eases with time; tell us if it troubles you, as we can treat it. Carry on with the earlier exercises.
Weight bearingNone through the stump. Full on the other leg, with the walker or crutches.
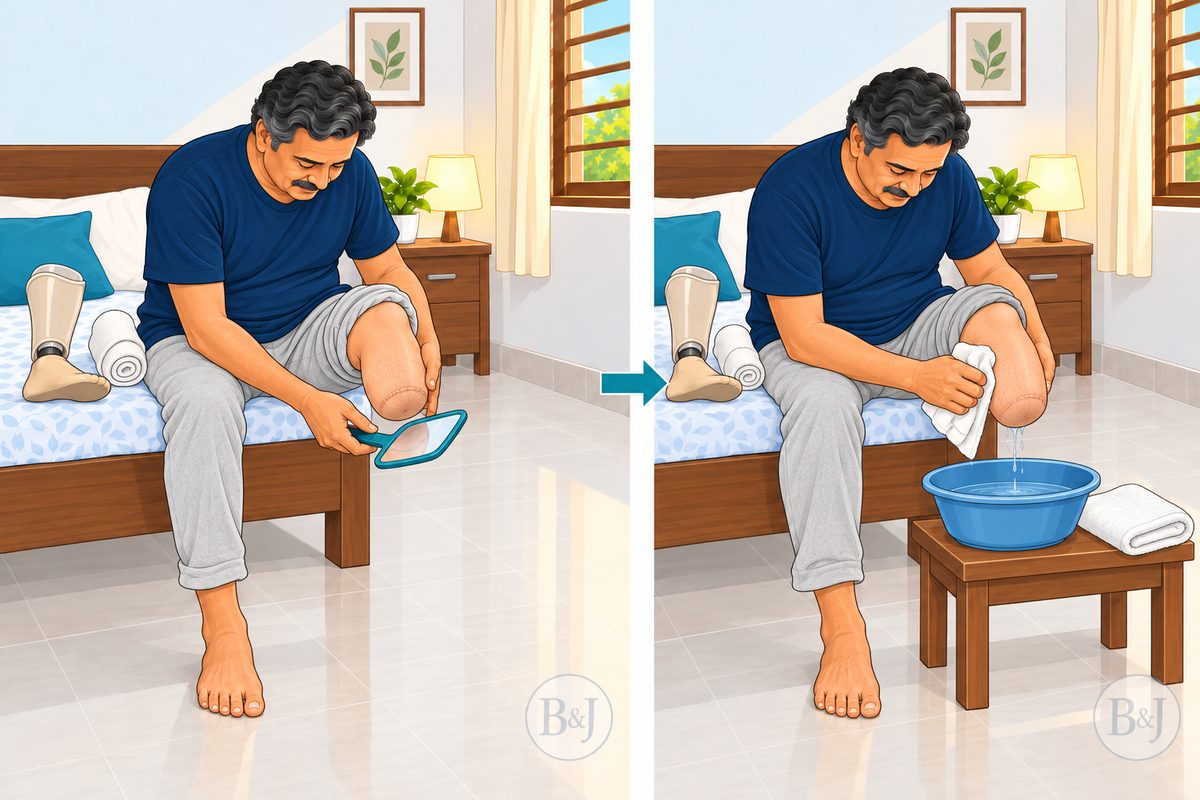
Check the stump skin every day
Every day, and every time the bandage or the artificial leg comes off, look at the whole stump, including the end and the back, using a mirror or asking someone to look. Wash it with mild soap and water and dry it well, especially in the skin folds.
Every day
Takes 2 minutes
Should feel: Skin that is clean and unbrokenShould not feel: A red mark that does not fade, a blister or a sore — tell us
Bandaging the stump
Use the elastic bandage exactly as we showed you. Start at the end of the stump and wrap upwards in a figure of eight, firmest at the end and looser towards the top, with no creases and never a tight band round the top. Re-wrap it whenever it loosens, and wear it day and night except when washing. If the wound is still open or leaking, bandage only as we have shown you for that wound.
All day
Ask us when to stop
Should feel: Firm, even pressure, tightest at the end of the stumpShould not feel: Throbbing, numbness, or a tight band at the top — unwrap it and start again
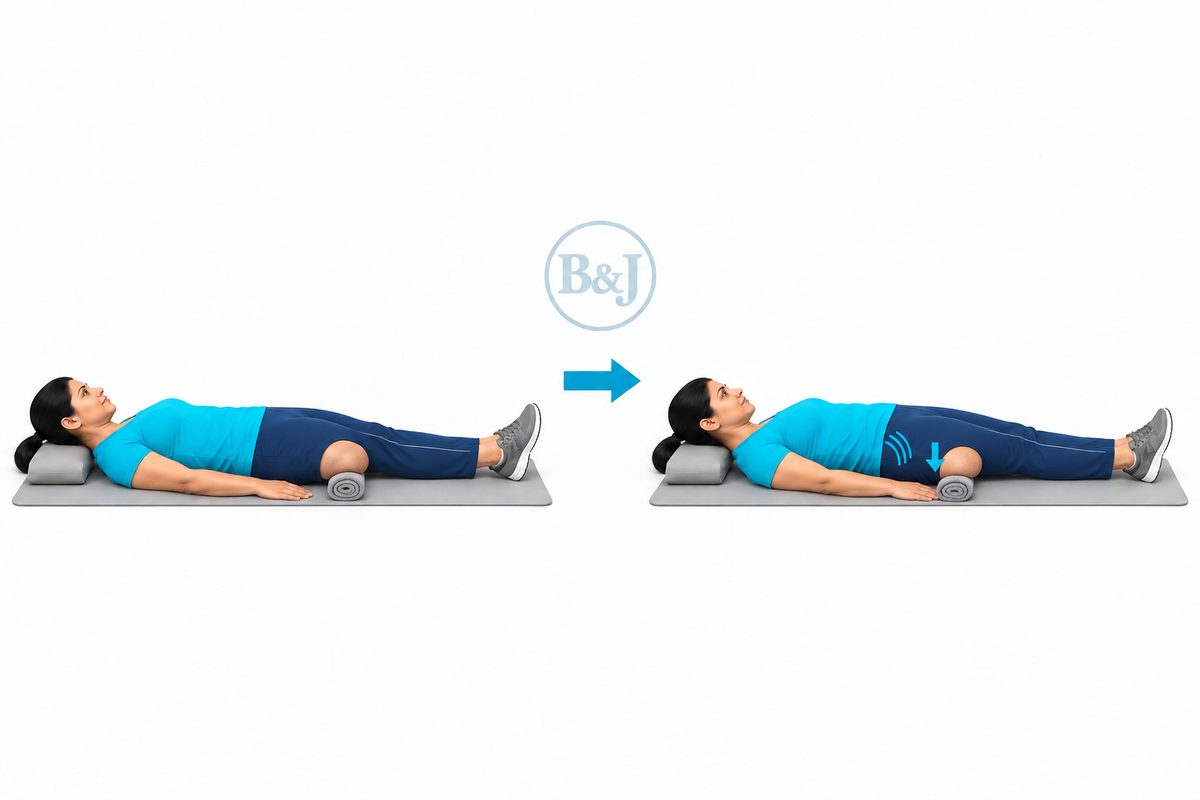
Pressing the stump down
Lie on your back with a firm rolled towel under the stump. Press the stump down into the towel, keeping the other leg relaxed, hold, then relax.
Hold 5 seconds
10 times
3 times a day
Should feel: The buttock and the back of the thigh workingShould not feel: Back pain, or pain at the scar or the end of the stump
Lying on the front, buttock squeeze
Lie on your front with the legs straight. Squeeze the buttocks and press the hips into the bed, hold, then relax.
Hold 5 seconds
10 times
3 times a day
Should feel: The buttocks working and the front of the hip stretchingShould not feel: Back pain
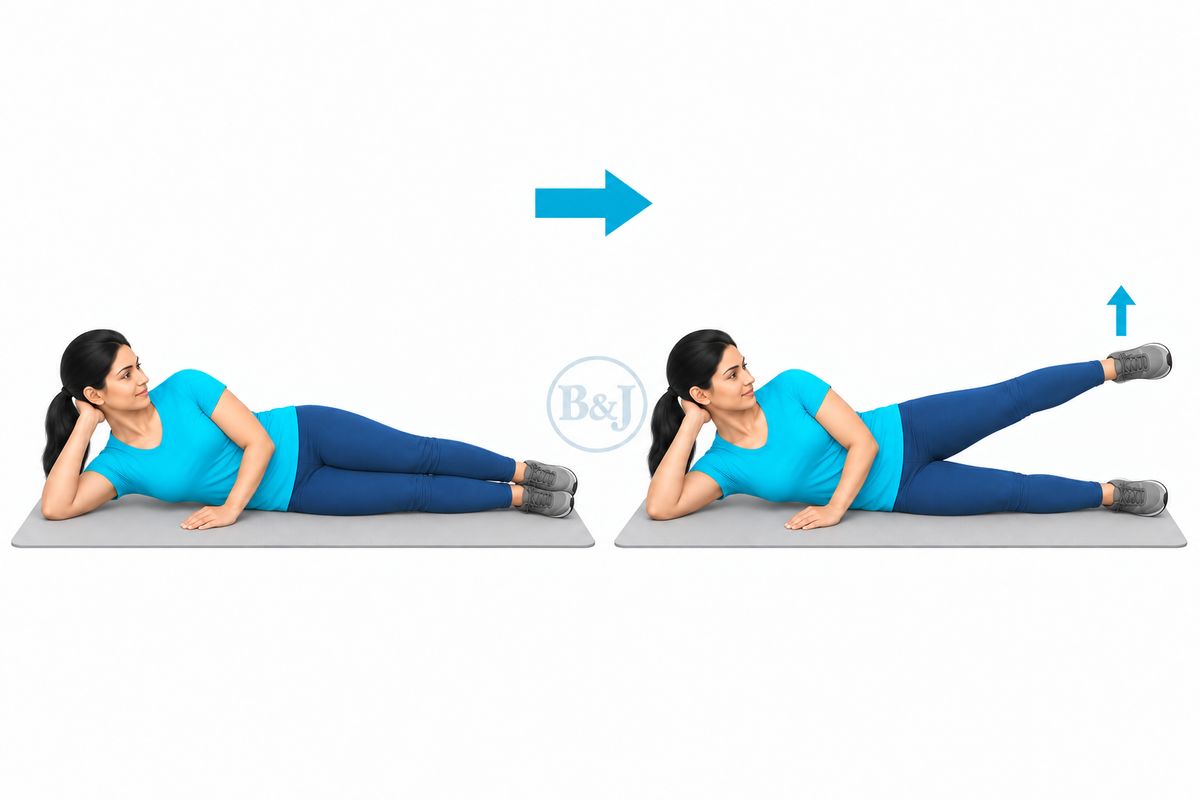
Side-lying hip lift
Lie on the UNAFFECTED side. Lift the top leg straight up.
10 times
Daily
Should feel: The side of the hip workingShould not feel: Back pain
Not yetA pillow under the stump or the knee, or between the thighs. Letting the stump hang over the edge of the bed, or resting it on the walker or crutch. Sitting for long hours with the hip and knee bent. Any weight through the stump.
Move to the next stage only after we have seen you, and the X-ray if one was planned.
Weeks 6–12
Getting ready for the artificial leg. When the wound has fully healed and the swelling has settled, we will send you to the limb-fitting centre to be measured. Keep the stump bandaged, or wear the stump sock we gave you, so it keeps its shape. Build up the strength of the hip, and the balance on the other leg. Carry on with the earlier exercises.
Weight bearingNone through the stump until the artificial leg is fitted. Then only as the limb-fitting team teaches you.
Pressing the stump down
Lie on your back with a firm rolled towel under the stump. Press the stump down into the towel, keeping the other leg relaxed, hold, then relax.
Hold 5 seconds
10 times
3 times a day
Should feel: The buttock and the back of the thigh workingShould not feel: Back pain, or pain at the scar or the end of the stump
Lying on the front, buttock squeeze
Lie on your front with the legs straight. Squeeze the buttocks and press the hips into the bed, hold, then relax.
Hold 5 seconds
10 times
3 times a day
Should feel: The buttocks working and the front of the hip stretchingShould not feel: Back pain
Side-lying hip lift
Lie on the UNAFFECTED side. Lift the top leg straight up.
15 times
Daily
Should feel: The side of the hip workingShould not feel: Back pain
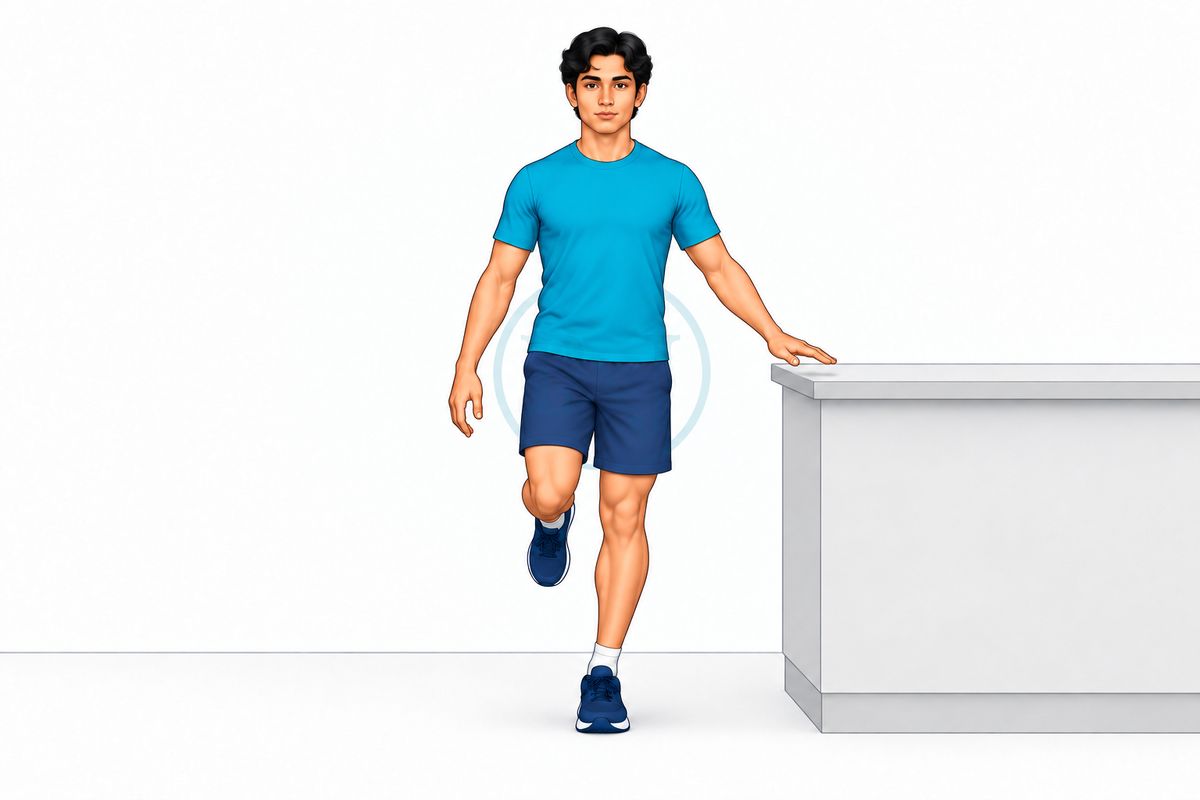
Single-leg balance
Stand on one leg beside a worktop.
30 seconds
3 times a day
Should feel: Working to stay steadyShould not feel: Losing balance — hold on
Check the stump skin every day
Every day, and every time the bandage or the artificial leg comes off, look at the whole stump, including the end and the back, using a mirror or asking someone to look. Wash it with mild soap and water and dry it well, especially in the skin folds.
Every day
Takes 2 minutes
Should feel: Skin that is clean and unbrokenShould not feel: A red mark that does not fade, a blister or a sore — tell us
Not yetA pillow under the stump or the knee, or between the thighs. Sitting for long hours with the hip and knee bent. Walking on the artificial leg before the limb-fitting team has taught you.
Move to the next stage only after we have seen you, and the X-ray if one was planned.
Month 3 onwards
Walking with the artificial leg. Build up the time you wear it, as the limb-fitting team teaches you, and check the stump every time it comes off. The stump keeps shrinking for some months, so the socket may need changing — come back if it starts to feel loose or to rub. Keep the hip strong and straight.
Weight bearingThrough the artificial leg, as the limb-fitting team teaches you. Keep the stick or walker until you are steady without it.
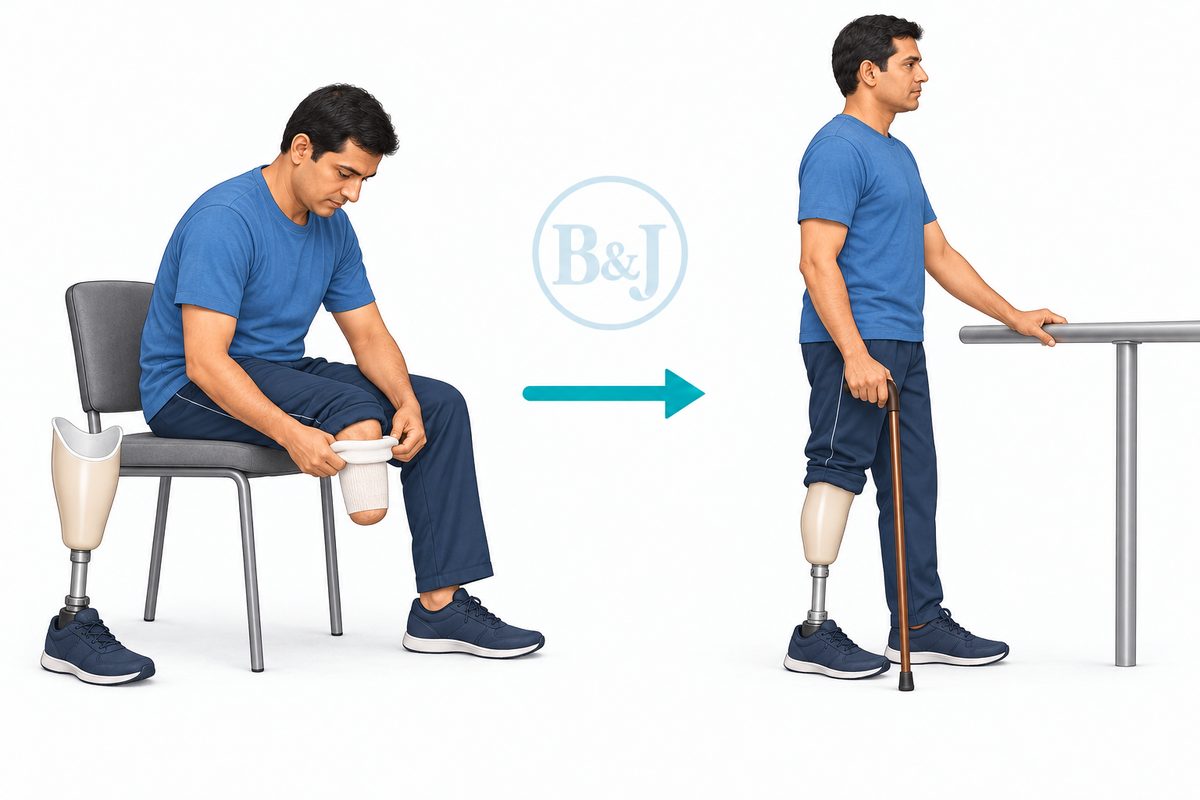
Wearing the artificial leg
Put the artificial leg on as the limb-fitting team taught you, over a clean, smooth stump sock. Wear it for a short time at first and build up a little each day. Take it off if it rubs or hurts, and check the stump every time you take it off. If the stump has a sore, do not wear the leg until we have seen the sore.
Little and often
Every day
Should feel: Firm, even contact, with no rubbingShould not feel: Rubbing, a red mark that does not fade, or the socket feeling loose — tell us
Check the stump skin every day
Every day, and every time the bandage or the artificial leg comes off, look at the whole stump, including the end and the back, using a mirror or asking someone to look. Wash it with mild soap and water and dry it well, especially in the skin folds.
Every time
Every day
Should feel: Skin that is clean and unbrokenShould not feel: A red mark that does not fade, a blister or a sore — tell us
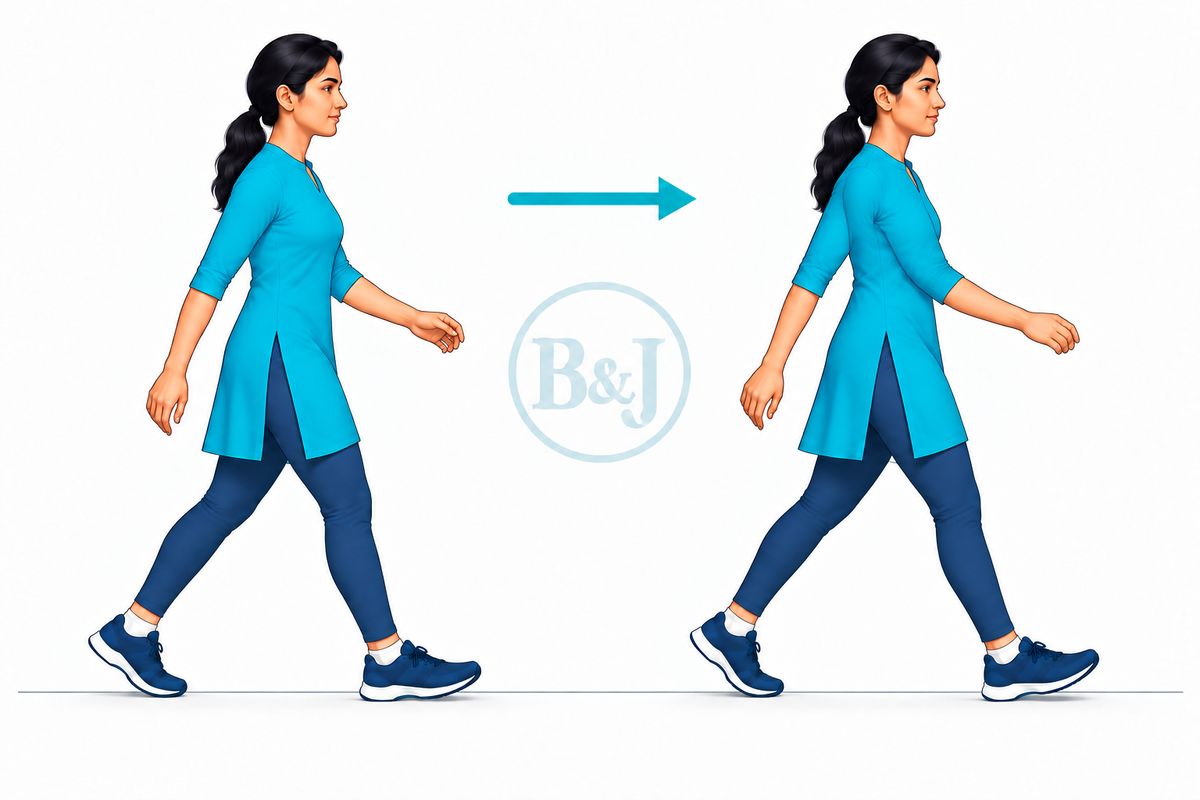
Walking
Walk daily. Build the distance slowly.
Little and often
Every day
Should feel: Easier walking over weeksShould not feel: Swelling next day — do less
Pressing the stump down
Lie on your back with a firm rolled towel under the stump. Press the stump down into the towel, keeping the other leg relaxed, hold, then relax.
10 times
Daily
Should feel: The buttock and the back of the thigh workingShould not feel: Back pain, or pain at the scar or the end of the stump
Lying on the front, buttock squeeze
Lie on your front with the legs straight. Squeeze the buttocks and press the hips into the bed, hold, then relax.
10 times
Daily
Should feel: The buttocks working and the front of the hip stretchingShould not feel: Back pain
Not yetWearing the artificial leg over a sore or broken skin. Squatting, sitting on the floor or using an Indian toilet — until we have told you it is safe.
Stop and telephone us if
Sudden breathlessness or chest pain — go to the nearest hospital
The calf of the other leg becomes swollen, tight or painful — go to the nearest hospital
The stump becomes hot, red and swollen, the wound leaks, a sore gets deeper or starts to leak, or you have a fever — come the same day
The skin at the end of the stump turns dark or black, or the wound opens — come the same day
A sore, blister or broken skin on the stump — stop wearing the artificial leg until we have seen it
A spot on the stump that gives an electric-shock pain when touched, or phantom pain that is severe
The hip or knee no longer straightens fully
A fall, especially onto the stump
Ready when you are.
Call either clinic during consulting hours, or send a WhatsApp message any time.